From the beginning of my transformer mic build experiments, I had wanted to use a transformer which was as close to the original BV-107 found in the Neumann KM84 as possible. That’s because my BFM (Big F’n Microphone) board is a modern recreation of the KM84 circuit but adapted to LDC capsules. CineMag makes a BV-107 recreation they call the 5722. It is a 6.9:1 turns ratio hum-bucking transformer which is ideal for the BFM circuit. I contacted them several times early on by email and really didn’t get very far (other than a price quote). They do not really have a web store per-se or a dealer network. Frustrated by that, I started using the low-cost imported Transformers and an expensive one by AMI.
A few weeks ago, I thought I’d go old school and actually call CineMag on the phone (I forgot my phone actually has that feature). David Geren himself answered the phone and took my order for a small batch. Wow!
The Shootout
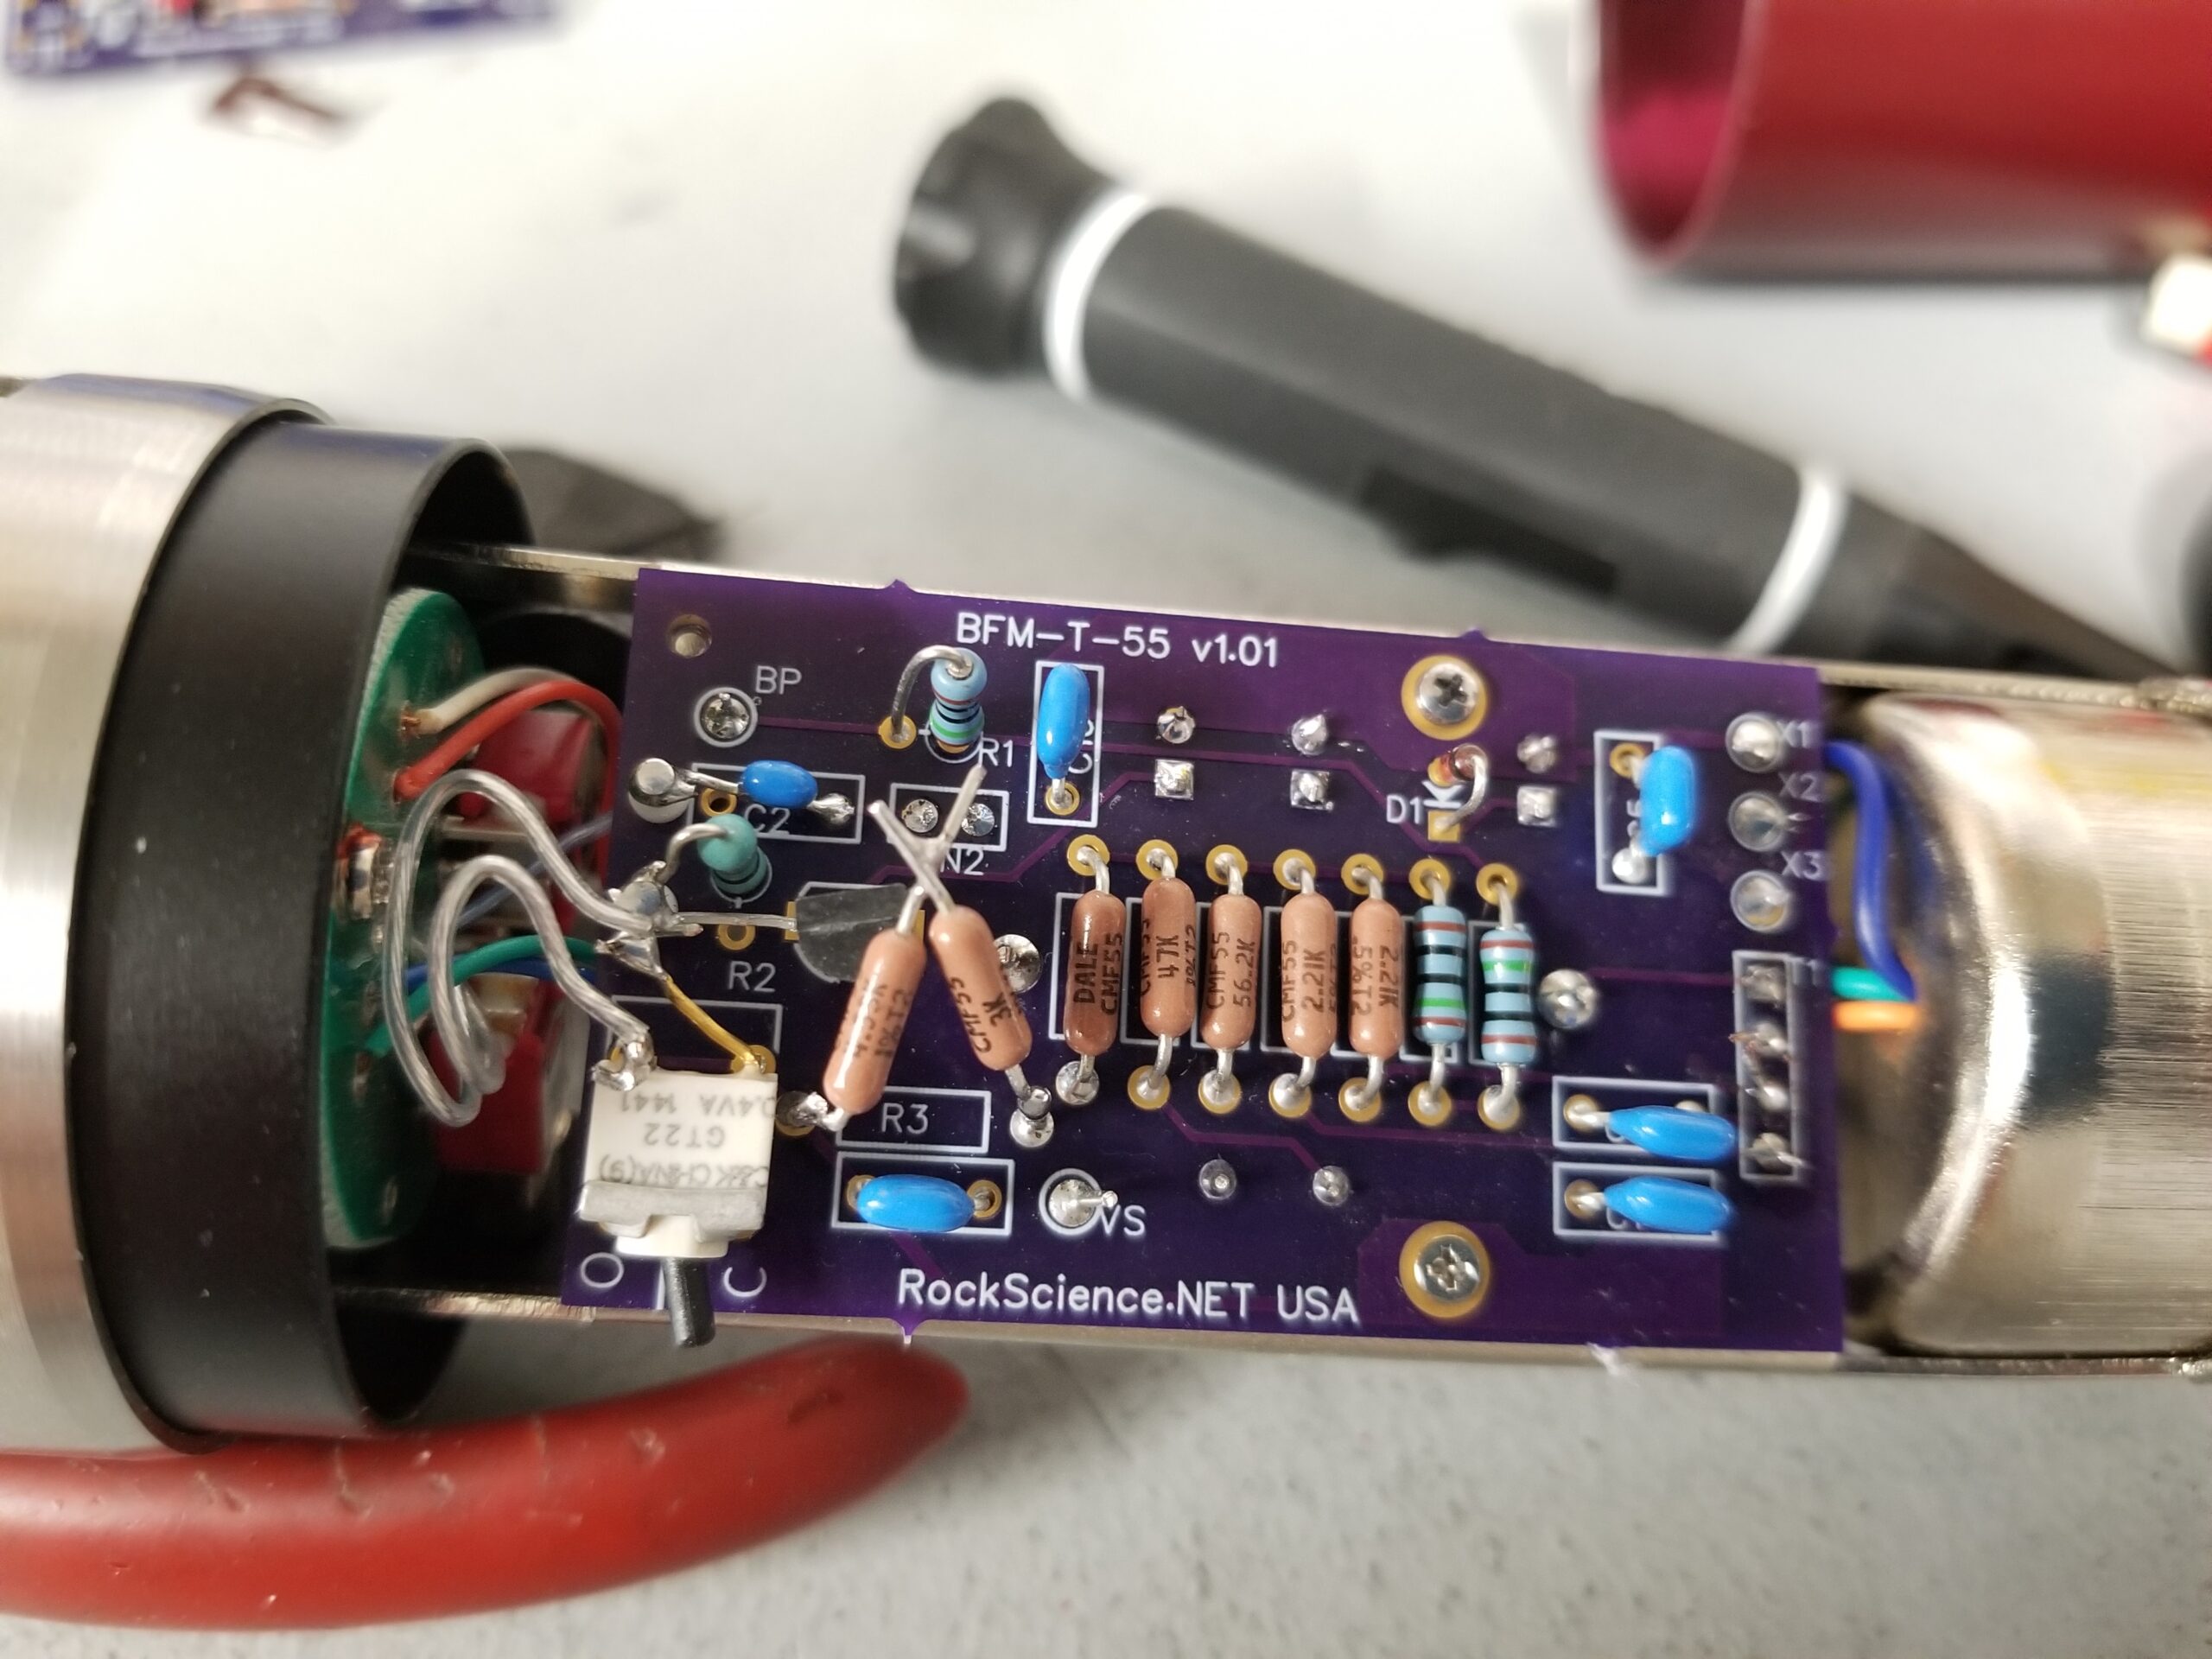
I had previously done shootouts between the Imported Chinese Transformer and the AMI. I have two RS/47Ts – each with one of those installed. For the CineMag test, I reworked a Sterling ST55 rebuild I had. This one also had the Chinese transformer but I swapped that out for the CineMag. All mics now have the same capsule and circuitry. The only variation is the transformer.
Below is a result of some recordings made with both. In all cases the AMI is first then the CineMag (after a short pause). Shorter and shorter loops let you hear the tonal differences easier.
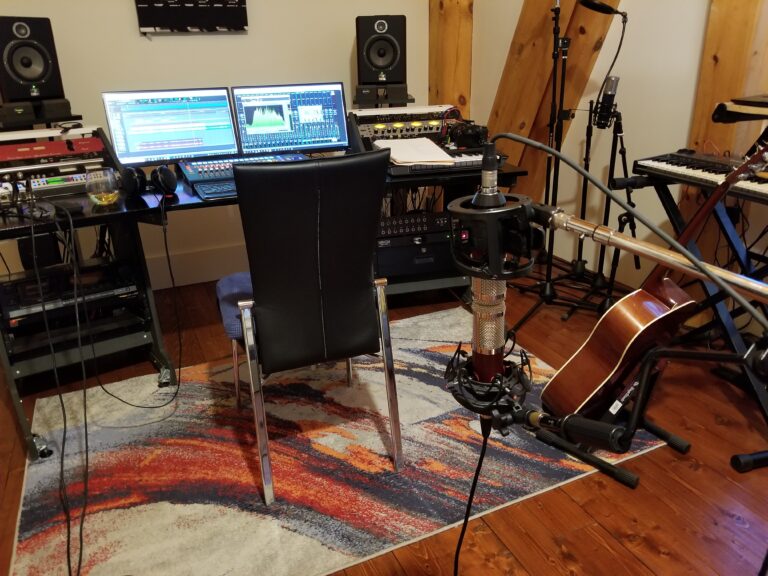
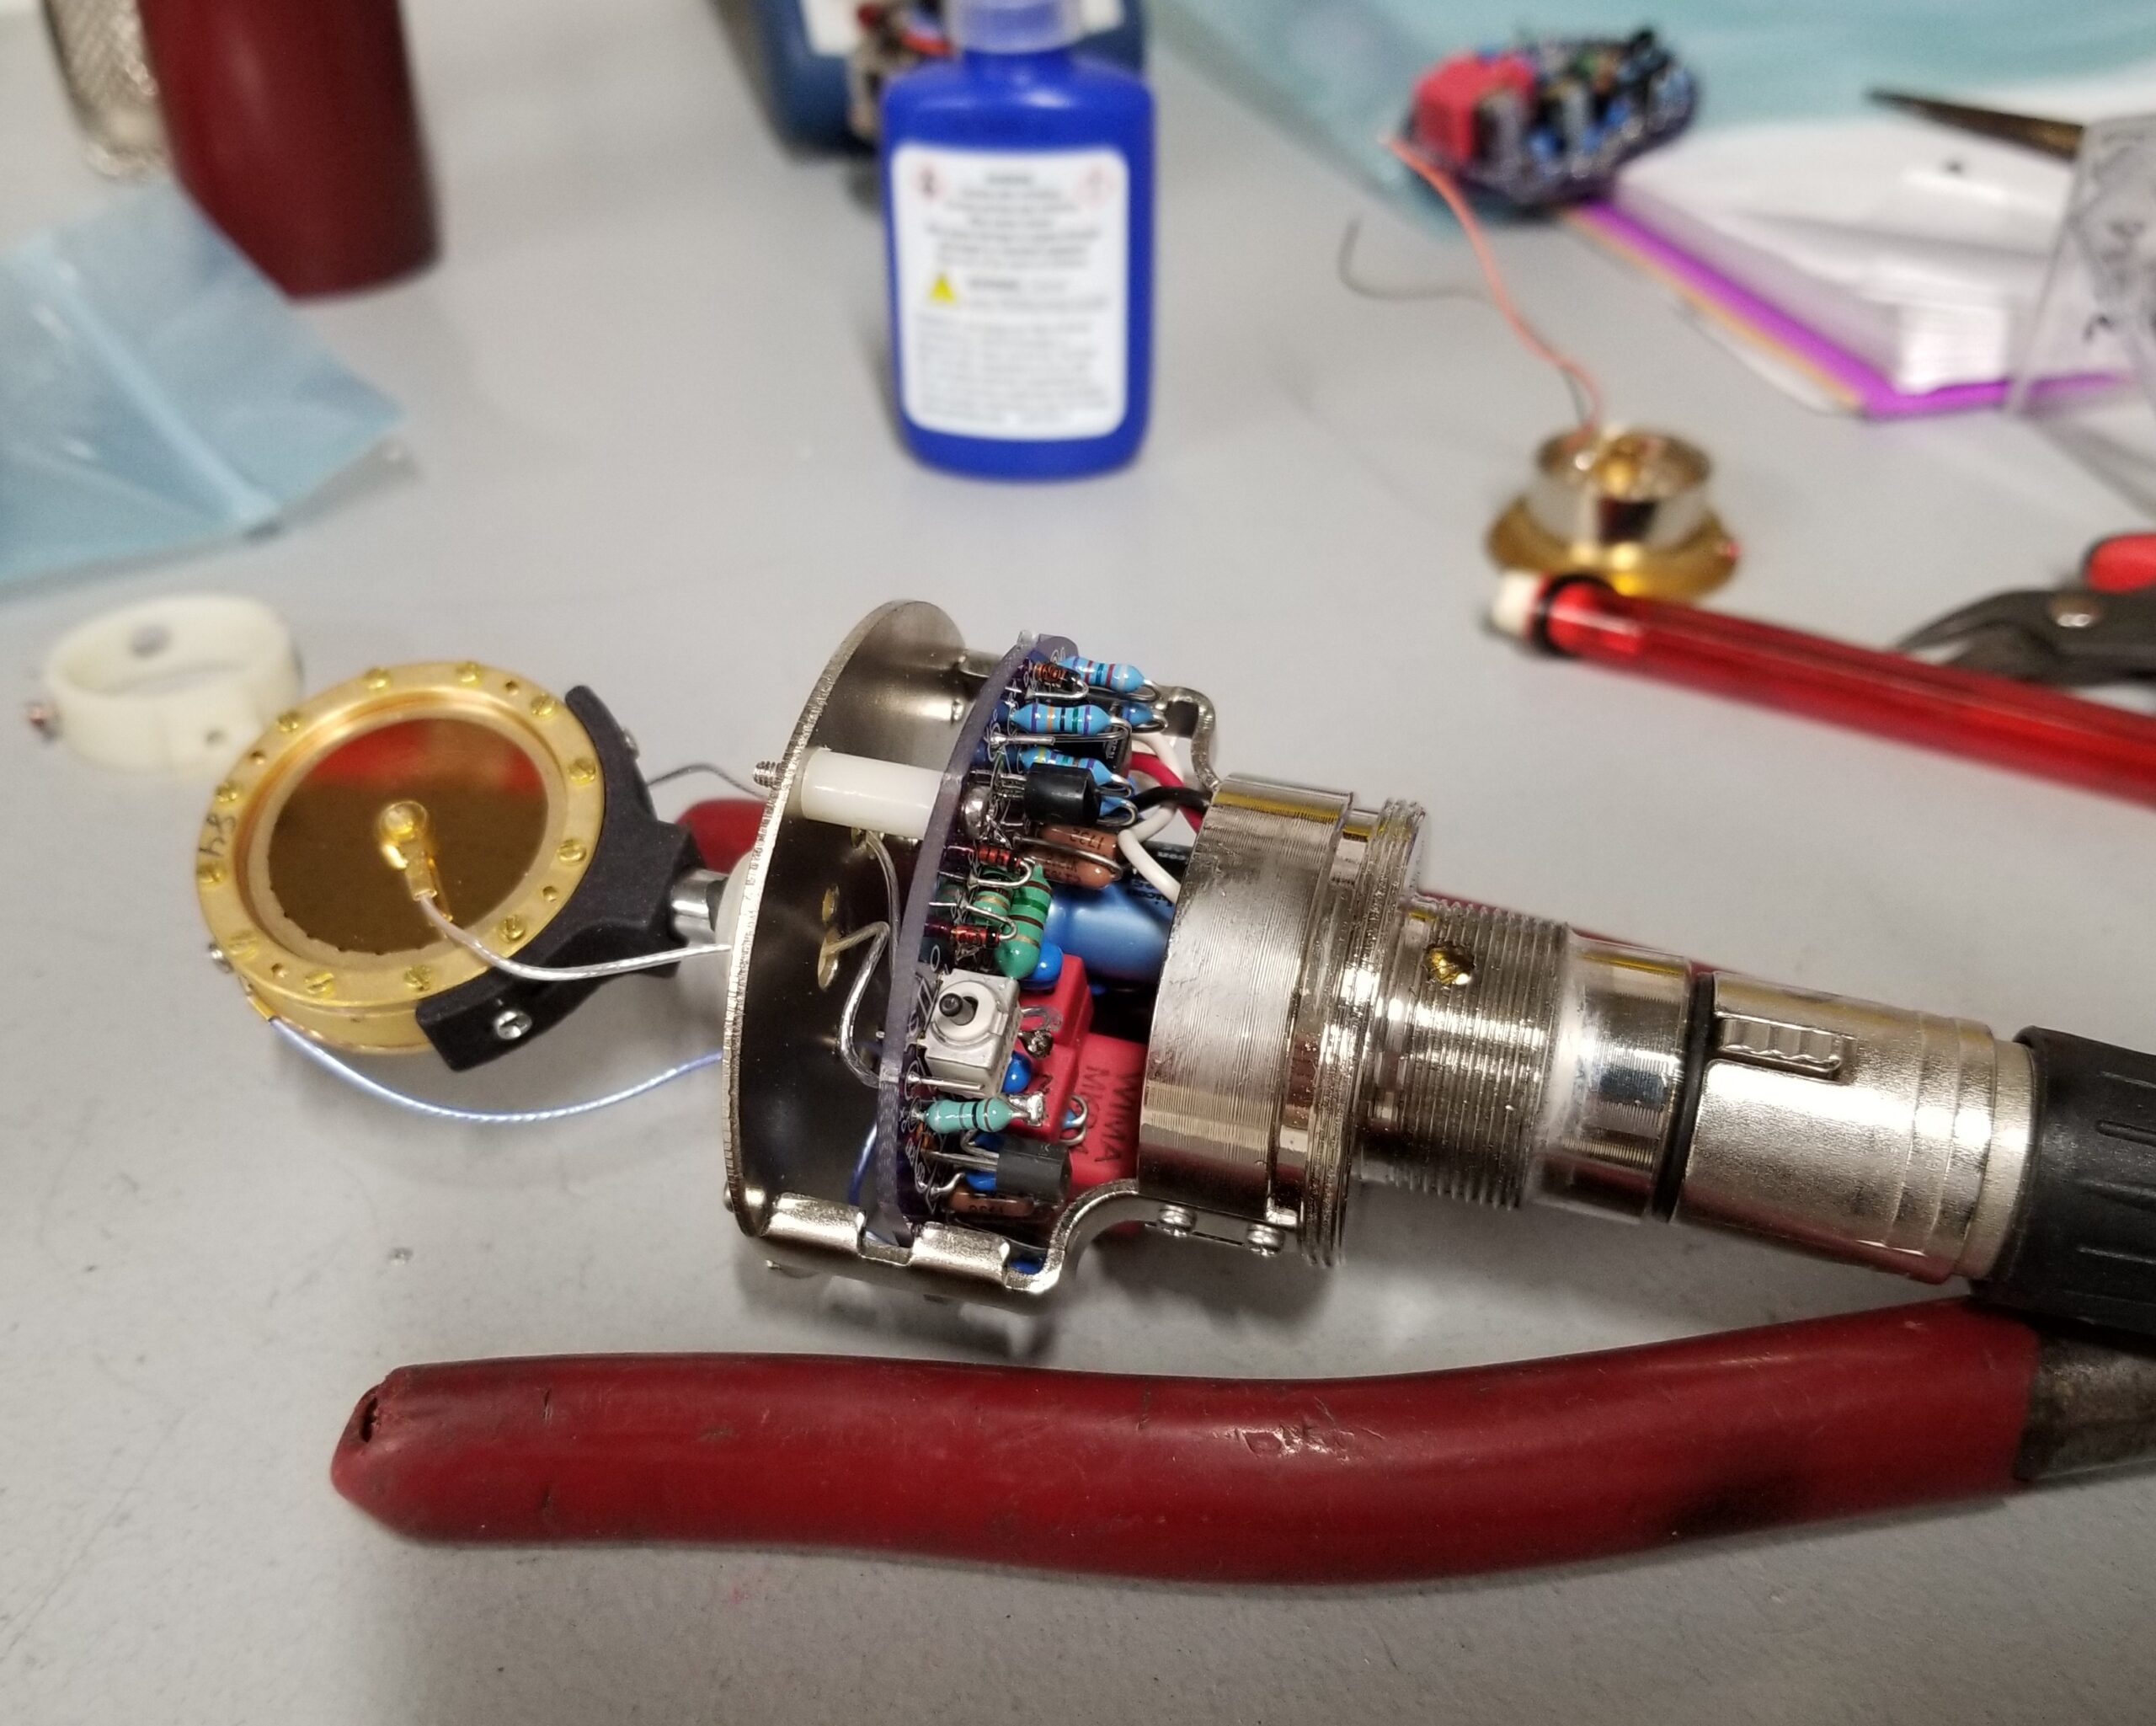
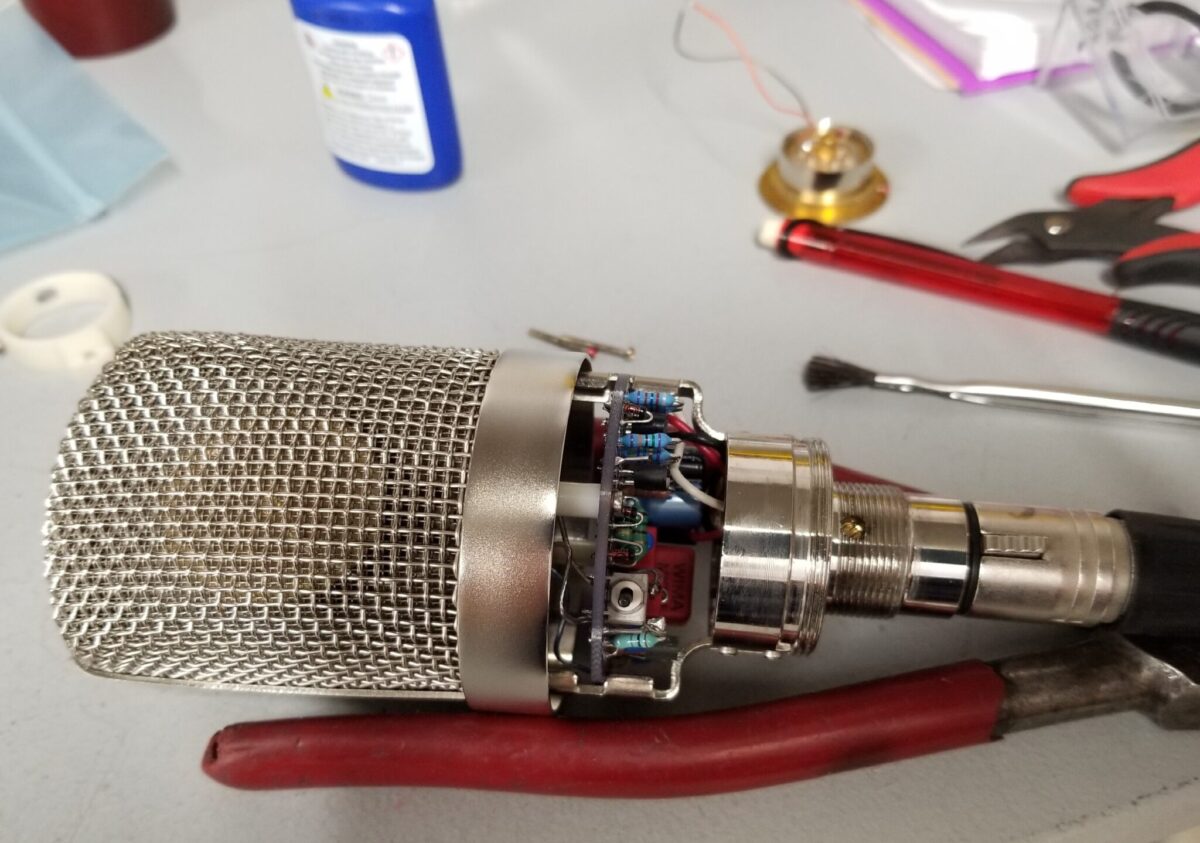
CineMag Transformers (L) ST55 Test Body (C) Shootout CineMag vs AMI (R)
To my ears, the AMI is a bit more mid-forward as the kids like to say. The guitar seems to have a bit more presence with the AMI, but the CineMag has a little more silky of a top-end. It’s that top-end sheen that I felt was missing from the AMI in my previous tests. They both have a beautiful crunch on the hard strums of the guitar. This is why we love transformers!
That’s what it sounds like. What’s it look like?
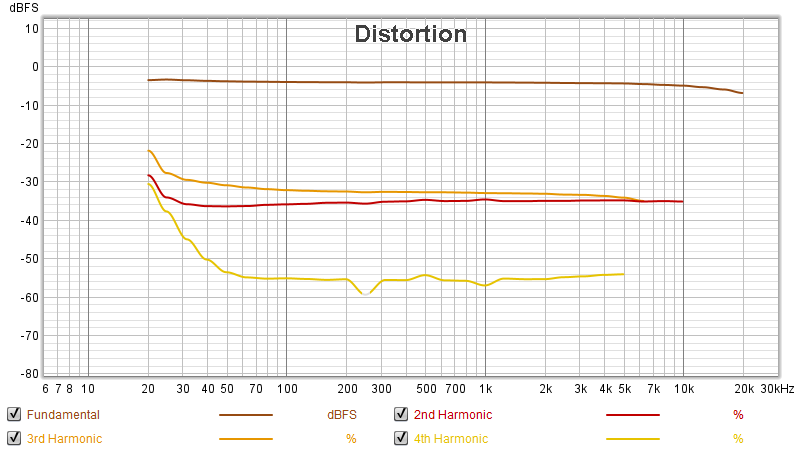
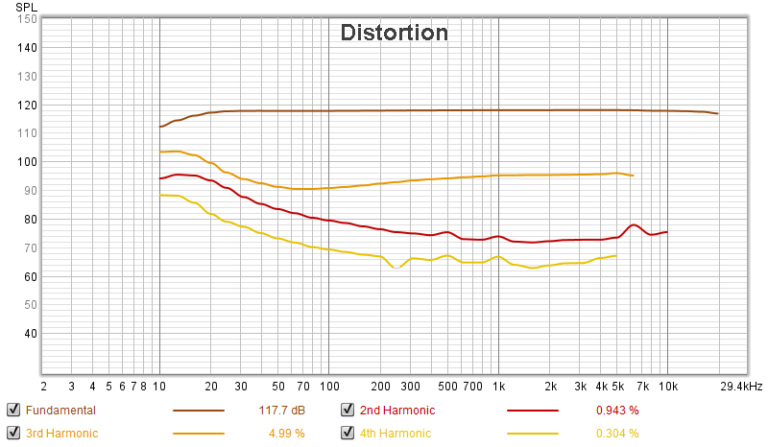
I ran swept-sine tests on both mics to compare the distortion and frequency response characteristics of the Circuit/Transformer. The differences are subtle but meaningful. The CineMag has a bit more 2nd and 3rd harmonic distortion over most of the spectrum. The AMI has a bit more in the very low frequencies. Interestingly, the fundamental frequency response shows that the CineMag actually has a bit more low end and a subtle drop at the high end. This just goes to show that the distortion characteristics have more of an effect on what we perceive as bright or dark than does the frequency response – at least with transformers.
In-circuit tests of CineMag (L) and AMI (R) showing 2nd, 3rd, 4th Harmonic distortion
Conclusions?
Overall, I think the CineMag is going to win the day. It is slightly less expensive than the AMI and I think more versatile. It pairs nicely with the k47 style capsules which have a relatively flat high end. The AMI would win if I wanted a very mid-forward mic with lots of harmonics in the low end. Maybe on kick drum or bass cabinets, upright bass, etc. This is all very subtle stuff and either would work well on just about anything. For that matter, the cheap Chinese transformers really don’t sound all that bad and I will still offer them in the shop.
I’m always yapping about MXL mics as being the ubiquitous budget studio microphone, but they are not alone in that space. RØDE has been a major player the studio microphone game since the 1990s. The NT-2 has been a very popular microphone in studios of all sizes and classes. But I’ve never owned or worked on one… until now
A customer contacted me about upgrading his NT-2. According to a little research on recording-hacks.com, the mic is really a pretty decent unit as-is. They do a good quality Schoeps style circuit. The downfall of the mic (as is with many chinese mics) is that they use a bright k67 style capsule on that Schoeps circuit. The thing is insanely bright! As my customer put it “There’s no de-esser on the planet that can handle the amount of sibilance it pumps out!”. Upon getting the mic in my hands and listening – he’s right. It is, in my opinion, an unusably bright mic.
I don’t normally do capsule-only upgrades, but for the RØDE NT-2, that’s about all that makes sense. The stock Schoeps style circuit is already using good quality, all discrete components (including WIMA caps). The circuit is split into two boards with the DC-DC convertor for the capsule power on a separate board. My jaSb circuit fits it all on one board (by sticking a few of the big caps on the back side). Besides that, the NT-2 has that fancy switch boards for pattern, and filter/pad which is quite cool.
With a K-47 style center-terminated capsule, this mic gets a softer, less harsh top end and retains a nice full low and low-mid response. The extra switches give this mic more range and ability and you don’t even have to open the body to get to them!
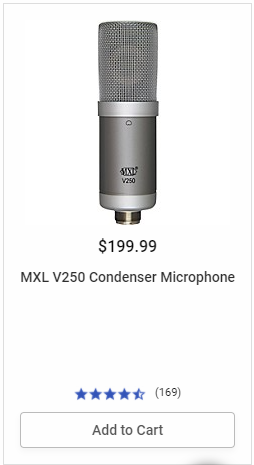
Musician’s Friend has resurrected their “Stupid Deal of the Day” promotions where they pick some mass-produced music thing and sell it very cheap. Recently, the SDOD was an MXL v250 Mic for $59.99 I saw this promotion being shared all over Facebook and one of those people contacted me and asked if it would make a good donor mic to mod.
Musician’s Friend Normal Price for the v250
The v250 is a typical low-cost transformerless MXL mic. It has a Small Diaphragm Capsule (despite looking like an LDC) and a mass-produced Schoeps-style circuit board. The body is essentially a BM-800 but with a very nice Headbasket. It also features a threaded base which can screw into various Spider type shockmounts. The mic comes stock with a hard mount only.
The rebuild was pretty straightforward. Being a brand new mic, I wrapped the body cylinder in paper to avoid scratching the (very thin) finish. The old guts were removed and the new stuff went in. I already had one or two jaSb boards built so this went pretty quick and easy.
The final Assembly was simple too. I really like the nice big headbasket on the v250. Everything fit just fine and the initial technical and listening tests were done with no issues.
Off to the Studio to do an “After” recording
While letting mics burn in, I like to record something with them. Usually, I do an Acoustic Guitar recording to just see if they have the sound. This one’s got it for sure.
The v250 is a fine mic to mod. As BM800 style bodies go, this one is nicer than the typical.
I recently bought yet another cheap MXL 910 on ebay. As I was considering what flavor to make it, I noticed a box of long-forgotten CK12 style capsules on the parts shelf. Earlier on, I was working on a CK12-ish flavor of my transformerless mics. I quickly ran into quality issues with these capsules. They sounded great – when they worked. But at one point, I had only two out of a batch of five that were useable. They are made at the same factory which makes my extremely high quality k47 style capsules, so it was a disappointment. Anyway, I sort of abandoned the “12 flavor” – maybe until now.
The Finished mic
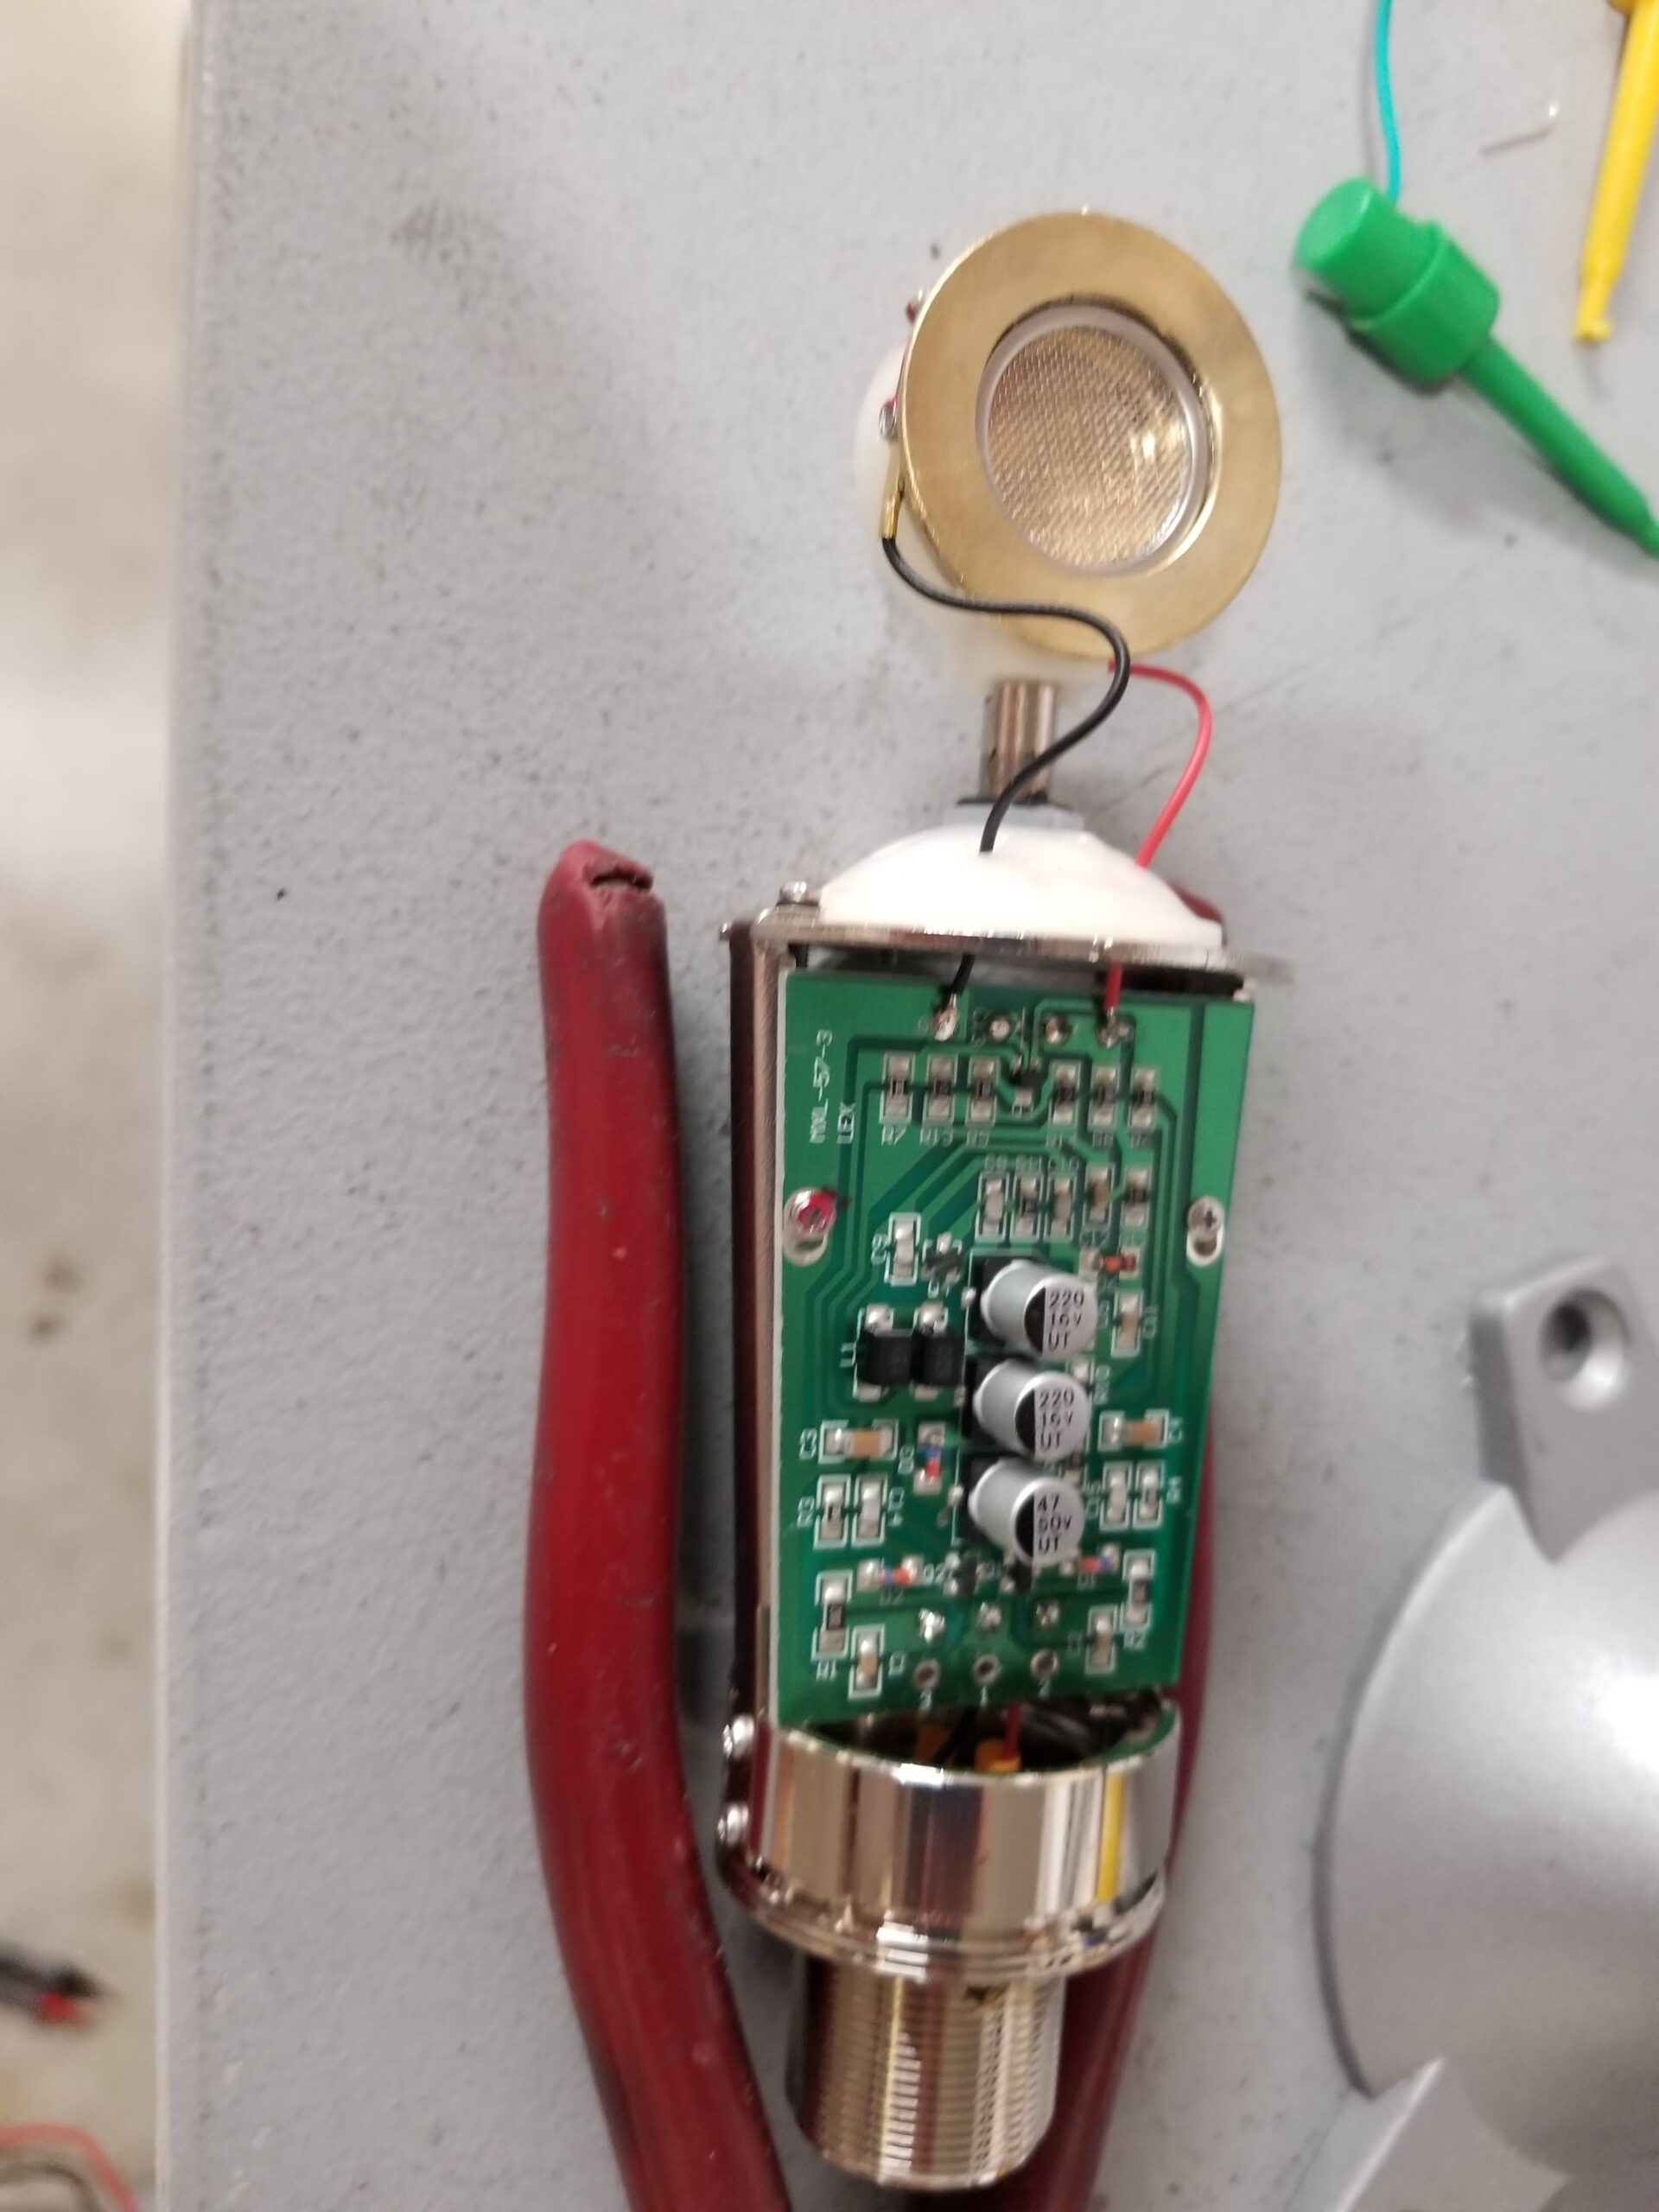
The key thing that sets the CK12 apart from the k47 is that it is edge terminated. As you can see below, there is no wire coming off the center of the diaphragm. Instead the white diaphragm wire is attached to the edge of the capsule. The classic AKG-ish sound of these capsules is an extended smooth and silky top-end.
CK12 style capsules do not always fit that well in some BM800 style headbaskets because of the height of the stand-offs for the backplate wires. The MXL910, however, has a nice big headbasket which easily accommodates a CK12.
Transformer or Non?
But, should it be a transformerless mic? Or should I go transformer-coupled? While pondering that decision, I thought about the results I’ve had with the Tab-Funkenwerk transformer I’ve been using. They have a very fat low and low-midrange and can tend to sound a little “dark” overall. But a CK12 is a brighter capsule! So maybe a CK12-style capsule in a transformer coupled mic with the Tab-funk tranny could be pretty cool!
What we have here is a mic with a CK12-style capsule, a KM84 style circuit and a T12-style transformer. Will it be an abomination of nature or maybe something special?
These Go to Eleven
As soon as I plugged this in to my test mixer at my workbench, I knew I was onto something. The fatness and fullness in the lows and low mids of the Tab-Funkenwerk tranny combined with silky bright top end of the C-12 is pretty amazing. After one quick test on acoustic guitar in the studio, I’m pretty excited. It has lots of everything. Full lows without being boomy. Silky highs without being harsh. And a nice bit of transformer crunch/compression that I expect from the AMI transformer. The mic output is hot! I might experiment with a fixed 3 or 6db Pad. On the other hand, that strong signal is probably contributing to the extra crunchy saturation of the transformer so maybe I’d opt to pad these at the preamp on loud sources. As always with my test recordings, this is straight into a CAPI vp312 preamp with no EQ or other processing at all. The Guitar is mic’d from about 20 inches away with the CAPI preamp gain on the 2nd from lowest setting.
This is not the most versatile mic I make. I’d say my good ol’ transformerless mics with the k47 style capsules take that prize – they work great on anything. But this mic would be beautiful on vocals, acoustic guitar (and other stringed instruments) and percussion. I would probably not reach for it to use on a guitar or bass amp or kick drum. For sure, it’s another fantastic flavor and this particular one will find a home in my personal collection.
Not sure yet if I will add any CK12 flavor mics to my list of standard offerings in the store. Although this particular capsule is working fine, I’ve had a bad experience with them in the past. Maybe I had a bad run of them. Maybe not. I want to see how this one works over the long term for a while and maybe try another build or two before I start offering them to non beta-testing customers.
Since the last entry, I’ve got a handful of Transformer Coupled builds under my belt including three Sterling ST55s and two RS/47Ts. This led to some minor tweaks to the circuit boards – mainly for fit and layout and a few new build tricks. I love these mics!
Wanting to try some higher end transformers, I finally got my hands on a Tab Funkenwerk T12 from AMI (USA). I still had no luck getting anyone from Cinemag to return emails trying to buy their product. The AMI was in stock and I had it within a week of ordering it. This thing is pretty pricy so I’d been very curious about what it would bring over the Chinese transformers I’ve been using.
Is it worth the money? Depends. Read on…
Data
I wanted to get some idea of how these guys perform in a clinical situation on the workbench with test signals. First, answer “why are transformers cool?” Everyone likes to throw around words like “warm” and “mojo” and such when they talk about this stuff. To me, what’s going on is mostly about the harmonic distortion you get from a transformer. Generally, Transformers are pretty clean in higher frequencies. It’s the low end where they get “funky”. So what do the harmonics look like?
CN T8 1-4th harmonicFunkenwerk 1-4th harmonic
As expected, both transformers have the most harmonic distortion in the low end. Where they differ however is that the Chinese 3rd and 4th harmonic fall off pretty quickly at higher frequencies, but they stay more constant in the AMI. The CN T8 has a stronger 2nd harmonic in the mids and highs but most of the other harmonics were stronger in the AMI. I’m not showing it here, but when I displayed the higher order harmonics (up to 8), the same trend continued. The CN T8 harmonics dropped off more in the mids than the AMI which stayed more constant over the whole range. My guess at this point is that the AMI is going to have more mojo (ok, here we go with the words).
Note that the response of the fundamental rolls off more in the low end on the CN tranny. Let’s look at that closer…
The CN T8 transformer definitely has a bit of a High Pass effect going on. It’s down 3db at 35 Hz. It’s subtle but meaningful as you will hear below. As a sanity check, I temporarily doubled the size of the coupling cap to see if this rolloff was because that was undersized. It made no difference. The rolloff is definitely from the tranny. I think it’s clear that this is one reason the CN transformer is one fourth the cost of the AMI.
Listening
I was anxious to compare these two transformers so I quickly finished up another RS/47T that I had in progress. Also some fresh PC boards arrived today, so I was able to use the latest version of the transformer adapter board. It still needed a little adjustment with a dremel tool. Next rev will be perfect! Anyway, I set up the two mics over/under and recorded some acoustic guitar. As always, both mics went through identical CAPI vp312 preamps and levels were trimmed to within a tenth-ish of a dB. There is absolutely no processing on either mic.
The Shootout Rig
My impression is that the AMI has a lot more going on in the lows and mids. And there is almost a subtle compression happening on hard strums – like a tiny bit of mxr dynacomp was switched in! The extra lows are not too surprising given the response curves above, but the stronger mids are probably due to the extra strong 3rd,4th (and higher) harmonics that the AMI seems to produce from its lowest frequencies. Both mics were hand-biased for minimum THD when they were built so the differences must be mostly from the transformers. The mic with the Chinese T8 feels lighter and brighter with more of a silky top end and it does not have quite as much thickness in the lows and mids. I think they both sound lovely. If I were wanting one of these for bass drum or bass or electric guitar amplifier, I think the AMI would probably win the day. But for voice, acoustic stringed instruments, percussion I think either mic could work wonderfully and the one with the Chinese T8 might even be preferred in some cases.
Listen for yourself here. The piece plays through twice. First time is with the Chinese T8 and the second is with the AMI. After that, there are some short loops repeated 4x with each transformer. The CN followed by the AMI
Every so often, I get contacted by someone interested in an rebuild of a Transformer Coupled Microphone such as an MXL2001 or Sterling/Groove Tube ST/GT55. My only solution has been to put a mic parts kit in those mics. This is by no means a bad solution. I’ve built a T84-55 kit from Mic Parts for my own ST55 a while back and the results are fantastic. The idea behind that kit and several other similar DIY project kits is to use the circuit and transformer from a Neumann KM84 in a large diaphragm mic (hence the “T84” in the kit name). The KM84 is an early phantom powered small diaphragm condenser (SDC) mic with an incredibly simple circuit. Despite that, if you can find a vintage 84, it will cost you four digits to acquire it. The KM series of Neumann mics is named for Klein Mikrofon or “Small Microphone” hence these are all SDC pencil style mics. The schematic for the KM84 is no secret and is incredibly simple. It has to be in order to fit everything in that tiny pencil mic (this is from long before surface mount components came along).
The KM series schematics are all over the internets
The Audio Path of a KM84 consists of just a few parts: An FET, two capacitors and a transformer. Because there are so few components, each one matters quite a bit. In fact, if you can find a vintage BV107 transformer from an original KM, it will cost you almost as much as the mic! When adapting this circuit to an LDC we get to lose one of those capacitors because the capsule is normally not grounded in an LDC. Therefore the audio path becomes even more minimal! And, because we have more room in an LDC, we can add a few non-audio path things to make the circuit perform better. The short version is that the KM84 circuit makes for an excellent transformer coupled LDC!
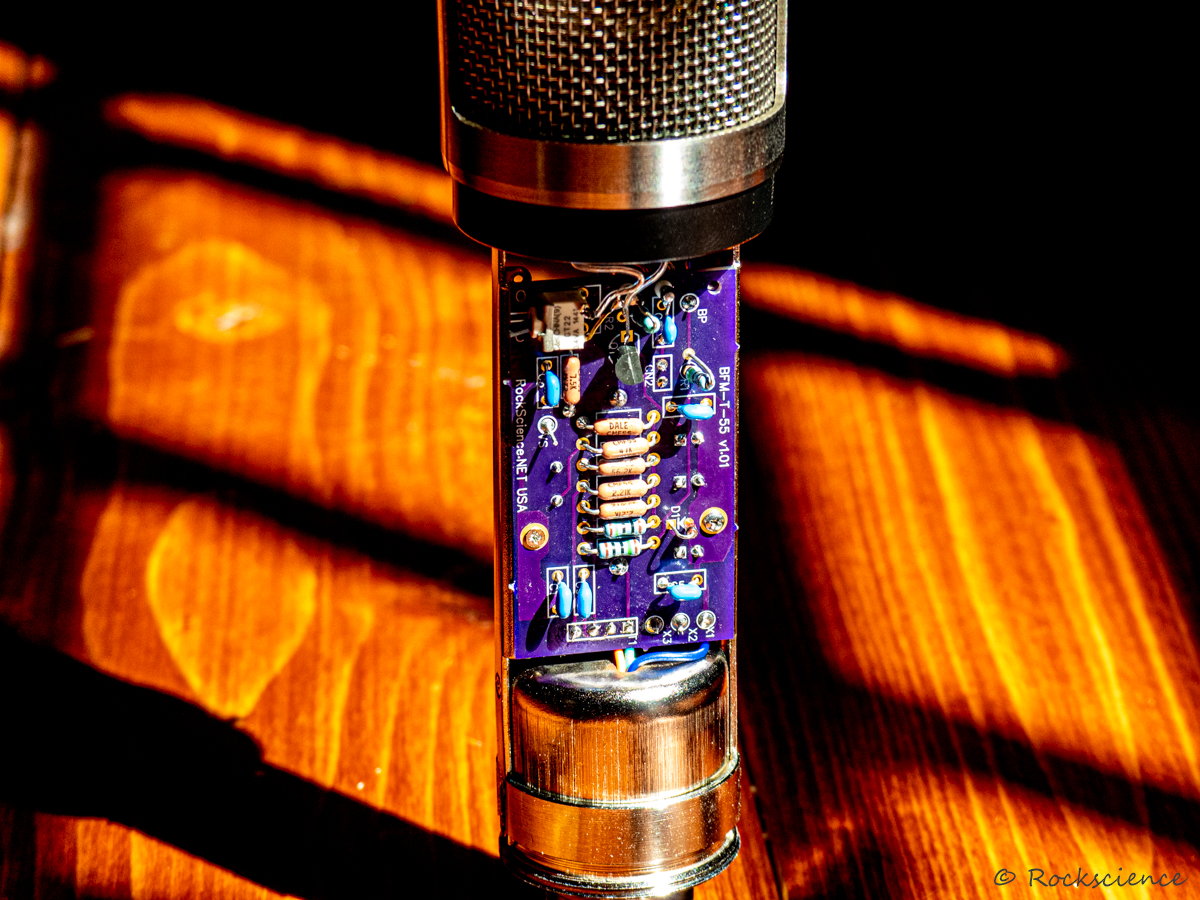
Into The Rabbit Hole
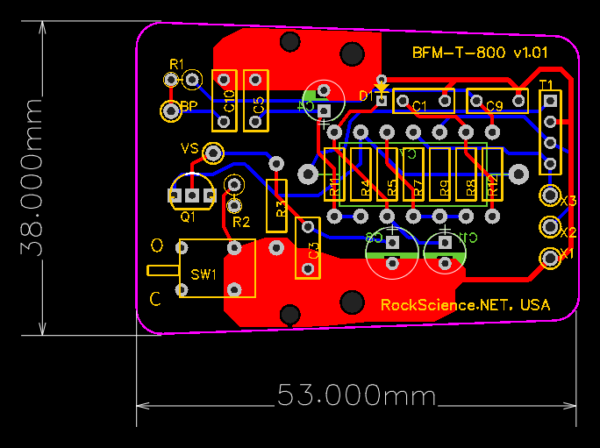
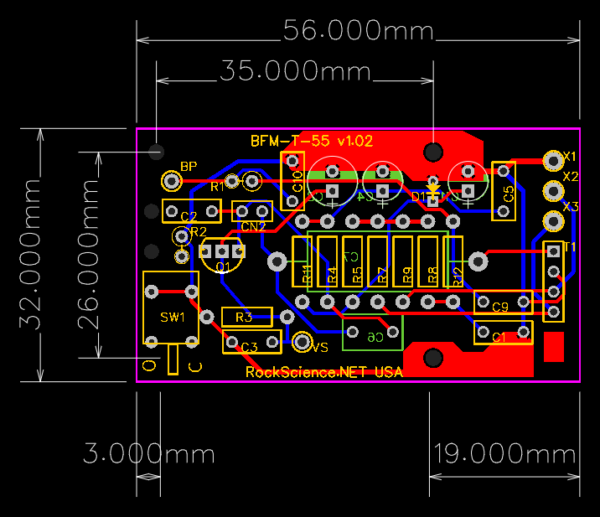
I decided to design my own LDC KM84 style board. I call it the “BFM” because this is for a BIG F’n Microphone, not a Klein Mikrofon. I’ve made two footprints of the board: One that will fit the Sterling/Groove Tube ST/GT55 and another “800” shaped board that will fit most low cost MXL bodies. The boards are called the BFM-T-55 and BFM-T-800 respectively. The T-55 will support the Pad and HPF switches on the Sterling/Groove Tube mic. Both the T-55 and T-800 versions have an optional internal pattern switch to allow switching into Omni Mode.
That Capacitor
The one capacitor in the audio path has to be a pretty big one. The 7:1 transformer is going to nominally present about a 10k Input Impedance to the FET stage so we’re going to need at least a 1.0uF cap to ensure a flat response down to 20Hz. That may not sound huge, but it wants to be a very high quality film cap and they start to get big and pricy at that value. Mic parts uses a Sonicap product which costs about $10.00! Being a bit of a Capacitor Skeptic myself, I couldn’t bring myself to spending ten bucks on a 1uF cap. I opted instead for a $3.09 ‘FastCap‘ from Solen. They say “France” on them so they must be good.
The Problem With Transformers
The only thing hard about building Transformer Coupled Mics is… getting transformers. The high-end goto for transformers these days is Cinemag. Their CM5722w is ideal for this circuit as it is a pretty faithful recreation of the original BV107. However, actually acquiring one of these mythical transformers has proven to be difficult.
The Mic Parts kit comes with a transformer which they have custom wound for them. I do not have such clout, so I’m out trying to score a seven-ish to one microphone output transformer. For my testing and development, I bought a 10:1 transformer from Analog Classics. It’s about $45 compared to about $80 for the Cinemag. I also bought a 7:1 Chinese transformer for about $22. These are in endless easy supply so it would be nice if it doesn’t turn out to be awful.
The Analog Classics Tranny
To The Bench
I had enough parts and bare boards to build a couple of prototypes. I also had to come up with some way of determining the ideal value for the FET bias resistor (R3) for each individual mic. FET Bias is extremely critical in this circuit! I purchased a 20K Bournes Precision 10-turn pot and mounted it in a box with some wires that can be clipped into the circuit. The trick is to determine the value that yields the lowest harmonic distortion, best gain and most symmetrical clipping. Next, I read the actual value of the pot and install a low-noise fixed resistor that is as close as possible to the pot. This has to be done individually for each mic (each FET actually).
Precision Bournes Pots for setting Bias. The 2K on the left is for the jaSb board. The 20K is for the BFMs
I use REW (Room EQ Wizard for the THD analysis). So you dial it in with the pot and then measure the actual value that got you the goods. For the first two mics, I came up with 7K7 and 8K1 for the R3 resistor values. I didn’t have those exact values in low-noise Vishay/Dale resistors, so I put a couple in series to get close enough for now (I’ve since ordered a whole series of Vishay/Dale resistors between 5K and 8K.
First Tests
After my prototyping phase, I had three mics to work with:
Sterling Audio ST55 with Mic Parts board and Transformer
Another Sterling Audio ST55 with my BFM board and an Analog Classics 10:1 transformer
A prototype BM800 body with the Chinese T-8 Transformer.
The first thing I did was fire up REW and did a sanity test comparing my two builds with the Mic Parts kit just to see if we’re in the same ballpark. We are. The Sterling with the 10:1 Analog Classics Tranny had a significantly lower output than the Mic Parts mic. I expected it to be lower but not by the 6.5dB that it was. Oh well it still had plenty of gain and great signal to noise ratio. The 800 with the Chinese transformer was within a half dB of sensitivity to the Mic Parts mic.
Next, I set up a shootout rig with the Mic Parts ST55 as the compare-to mic and one of my prototypes under it. They both went into identical CAPI vp312 preamps. My main interest is to evaluate the two transformers I have managed to acquire against the Mic parts mic. Apart from that, we are using the same FET, similar Capsules and the circuit is pretty close to that of the original KM84.
The shootout rig Mic-Parts ST55 (top) and my new ST55 with BFM prototype (Bottom)
I recorded some acoustic guitar with various combinations and took some time to listen to the result. To be fair, we’re comparing several components here: Capsule, Transformer primarily but also FET and ok sure… that fancy capacitor. I printed the MP ST55 against each of the prototypes. That Chinese capsule that I was supposed to hate so much actually turned out quite nice. In fact, I went back to the bench and swapped it into my Sterling ST55 and recorded some more. Here is a short loop of that recording. I am switching mics on every CM7-Em. The entire sequence of three mics happens twice. I won’t say which is which, but suffice to say, I don’t think this chinese T-8 Transformer is a compromise at all. But I still really want to get my hands on a Cinemag to try!
This took a few tries to get right. There is a balance here because you want the filter to remove low rumble or other unwanted tone from some instruments and voices. But on the other hand, a transformer does all its cool stuff in the low end, so you don’t want to cut too much. After three different capacitors (and two Mouser orders), I settled in on a cap that gives a great Lo Cut for this mic. Here is the in-circuit response with and without the filter
In-Circuit response with and without filter 10Hz – 5KHz
In Part Two, I dive in to comparing a couple different transformers.
As I’m always searching around for microphone donor bodies on ebay and Reverb, I see the same usual suspects from MXL and a few others. My jaSb (just another Schopes board) circuit is fabricated in two footprints that can pretty much fit in a wide variety of mics. Until now, the jaSb-990 version was strictly for an MXL-990 while my jaSb-800 version was for everything else.
A few weeks ago an MXL-920 came up in a search. I had never heard of this before but it looked pretty cool. This is what recording hacks has to say about it. It’s got a big fat body similar to a 990 but is about the same height as the more standard shape seen in the 910, 440, 550, etc. It has a great looking headbasket (that even has a Cardioid Emblem on it!). It has this gigantic square circuit board in it which is a form factor that my boards will not fit in. I figured I’d buy it and see what I could cobble together. I offered $30 and my offer was accepted!
A More Serious MXL Mic
What stands out about this mic compared to anything else from MXL I’ve rebuilt (besides how nice it looks), is that it really is an LDC. It features a 32mm K67-style single sided capsule. Unfortunately, it is coupled with a standard edition Schoeps style circuit which will not compensate for the HF boost these capsules have. So I expected it to sound bright and sibilant and I was not disappointed. That said, this LDC really does not sound bad. On acoustic guitar, it brought a nice bit of free top end and didn’t have any weird peaks or notches like the MXL small capsules have. So would my rebuild actually improve this mic? Let’s try and find out. The plan is to use a k47 style capsule and my jaSb board (assuming I can figure out how to mount it).
The Sibilant Theory
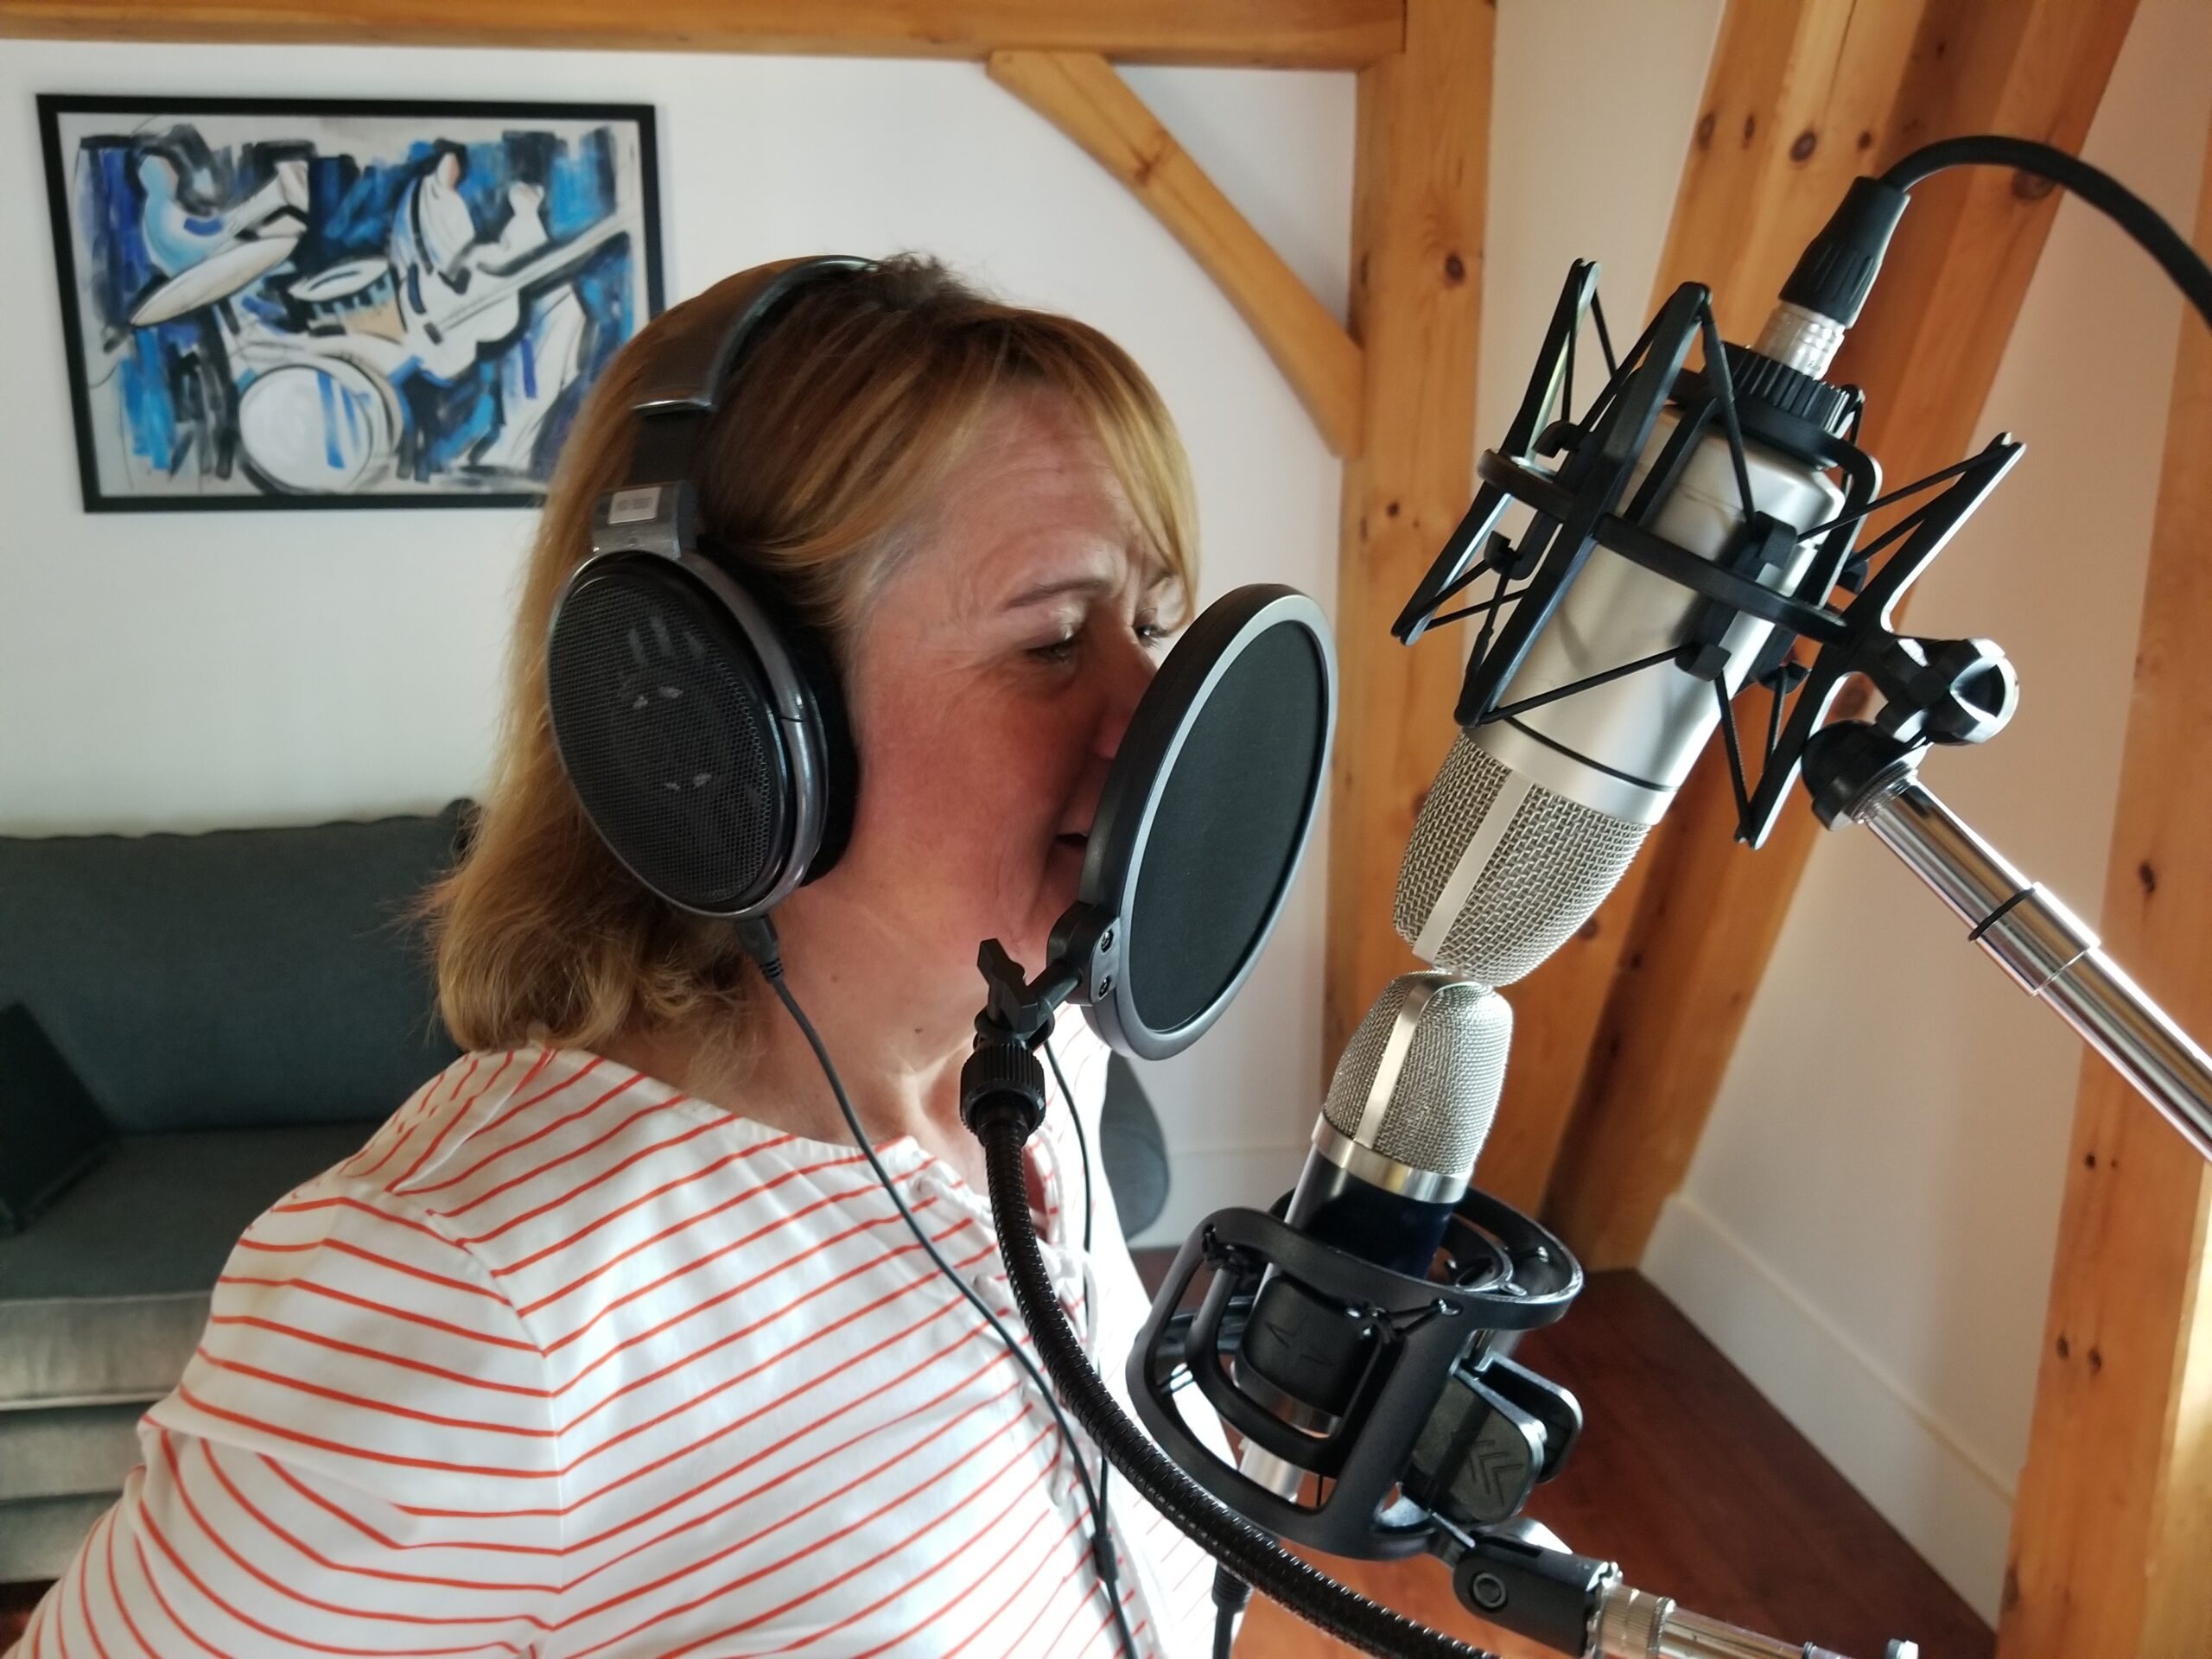
Since my theory is that I should be able to really improve the sibilance of this mic, I had my lovely assistant, Linda, do an up-close test with the 920 and what is essentially the future version of itself – one of my RS/47s. I had her read the following: SibilanCe is SometimeS an iSSue with condenSer micS. ESpeCially when the capSule is cloSe to the SourCe. It was pretty clear in this shootout recording that the 920 was way more sibilant. It was even easy to see on the spectrum display in Ozone. I used Identical CAPI vp312 preamps for the test.
Comparing Sibilance of the stock 920 with its “future self” – one of my RS/47s
The first thing to do was get that gigantic board out of there and figure out how to mount one of my boards in its place. I was considering 3-d printing an adapter of some kind to mount my board vertically like the original. I also considered mounting my board to their board and using the mxl board as just a bracket.
Kinda Silly, but I considered using the MXL board as a “bracket”
But then it dawned on me that this mic is the the same diameter as a 990 so my 990 footprint board might just fit the same way it fits in a 990. And it does… sort of.
A Grinding Wheel Solution
Not only does my 990 footprint board fit within the diameter, the two mounting holes line up exactly with the existing screw holes for the headbasket. The only problem is that the side rails will need a little modification at the top end with ye olde grinding wheel.
My 990 board fitting under the headbasket. Temporary nuts to hold in place while I wire. Note my fine grinding work
The rest of the build was fairly straightforward. I put my standard 3d-printed capsule saddle on the MXL pedestal and mounted a jaSb-990 board with optional internal pattern switch and a Brass Ring k47 style capsule. The existing XLR wires were a little too short so I had to pop out the connector and replace them. I had it together, powered up and run through the initial electrical tests in no time.
Capsule Mounted and WiredNew XLR wiresVintage Greed Paint JobJust after the first power-up and testing
A New Favorite
This mic came out great. It looks so cool that my brain thinks it sounds even better. I went with the Vintage Green paint on the cylinder. I will do some testing and recording with it, but I will have it available in the shop soon too. I’ve since been on the lookout for more of these but they seem pretty rare. Although I got this one very cheap, I would probably be willing to spend a little more on them because – well I like it. And the other reason is that it comes with a k67 capsule I can sell on ebay.
Do a google search for BM800 Microphone and you will find a million sources of them on Amazon, Ali express, ebay and many other online outlets. You can often buy one for less than $20 including a cord and a shockmount! These are seriously cheap mics. I belong to several Facebook Groups about home recording and every once in a while someone posts a link to one and says “can I use one of these?”. Within minutes all the seasoned pros jump on the poor guy and rag on this microphone endlessly. My response is usually “well if you let me rebuild it, it can be great”.
By mod of course, I mean totally gut it and replace everything inside the body.
Although until now, I had not done an actual off the shelf BM800, this is really nothing new for me. The bodies that I import from China to build my RS/47s in are actually empty BM800 bodies. The internal frame and cylinder are nearly identical across all manufacturers of these mics. As such, my jaSb (just another Schopes board) circuit board is designed to fit perfectly in these bodies (as well as lots of other cheap mics from MXL and others).
My buddy Jeff from Newclear Studios in NY found a broken BM800 on craigslist and fetched it for me. I thought it would be fun to give it a new life.
The Craigslist Rescue BM800 Pre-Surgery
Normally, I like to do a little before recording to demonstrate the improvement, but in this case the mic was non functional and I really didn’t want to spend the time doing a repair only to throw away all the guts afterwards.
Out with the old…
The board in this mic is a very minimal Schopes style board built entirely with surface mount components (except for the FET). The capsule looks like something you would find in a telephone from the ’70s!
Fully disassembled reveals the standard BM800 frame
In with the new…
Capsule, Saddle and Board
The assembly was no different from my RS/47 build. The frame and headbasket in this one were actually decent quality and this one even has gold-plated XLR pins (most BM800s do not) so I didn’t have to replace that.
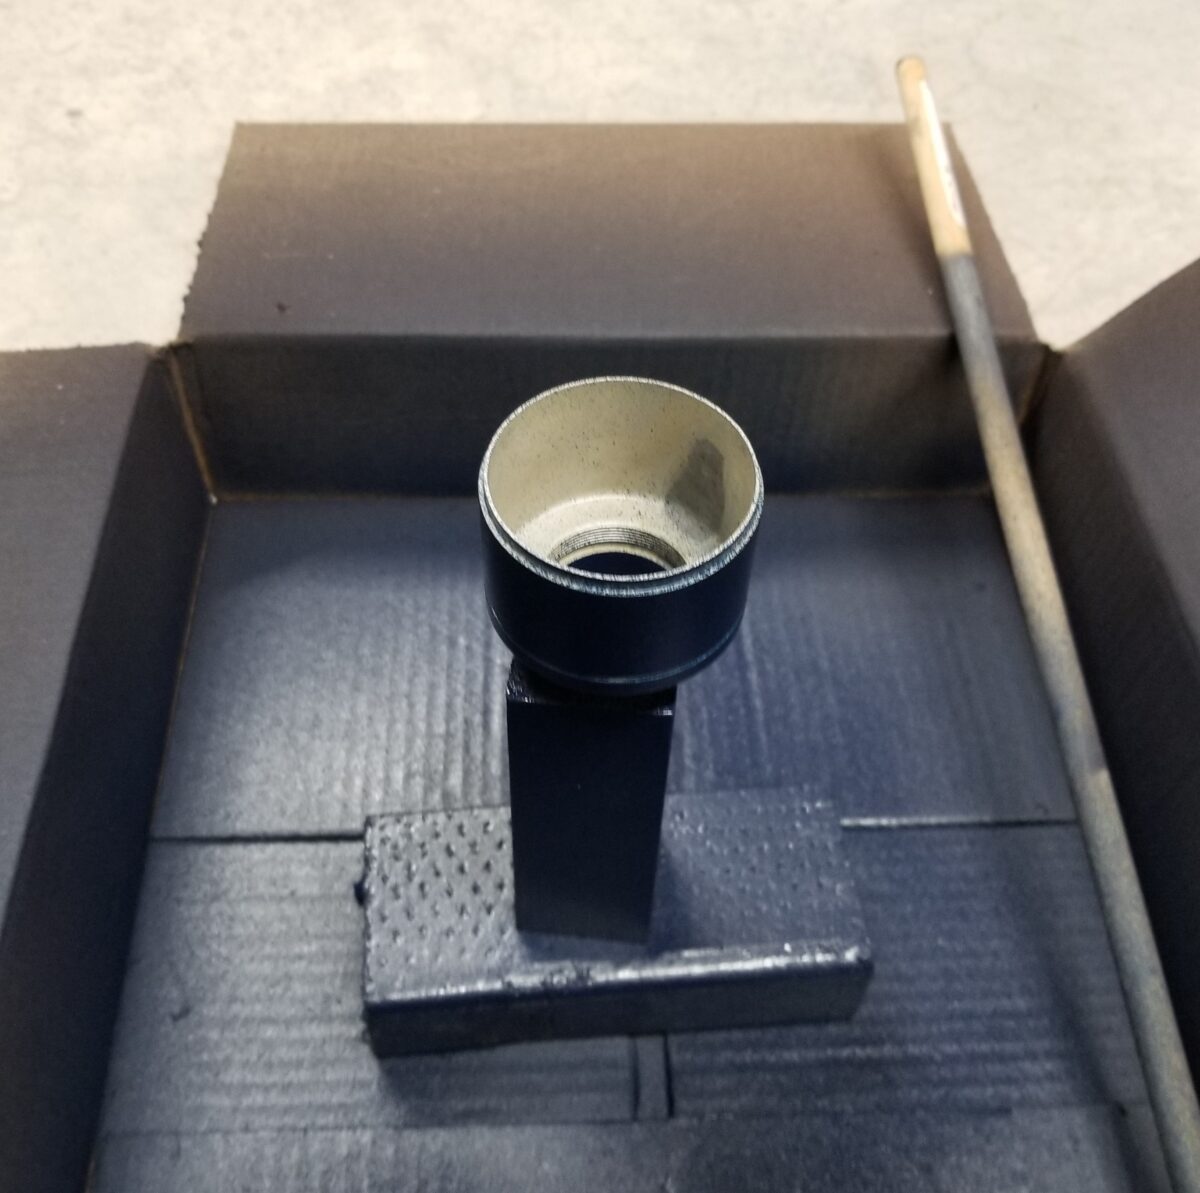
Lastly, we had to do something about that color… So off to the “paint shop” (a cardboard box on the floor) and the final marketing photo shoot:
Fully Rebuilt, Burned in and Tested and repainted BM800
What’s it sound like?
This mic is exactly the same as all my other existing Transformerless LDC builds. I don’t have a recording of this mic in particular, but the best illustration for the way these sound can be found in this video. Everything you hear is recorded with my builds using the jaSb circuit and these Brass Ring k47 Style Capsules.
I had always wanted a studio desk like an Argosy—angled rack units right at the desktop, everything within reach. But I held off. The prebuilt options didn’t quite match the layout I wanted, and… the price tag was hard to justify. Every so often I’d sketch out a DIY recording studio desk, but life would get busy and the project would get shelved. So I made do with a generic office desk and a couple of external racks.
After seeing more and more impressive DIY studio desk builds online, I finally committed. One choice that made things easier (and cheaper) was building it out of MDF instead of plywood. I hadn’t considered MDF at first, but seeing the great results others achieved convinced me. In the end, I had a custom desk that I love—complete with 16U of rack space above the desktop and another 16U below.
If you’re interested in how this ties into my gear setup, especially my mic mods, check that out too—this desk was the starting point for making my studio truly functional.
So here we go…
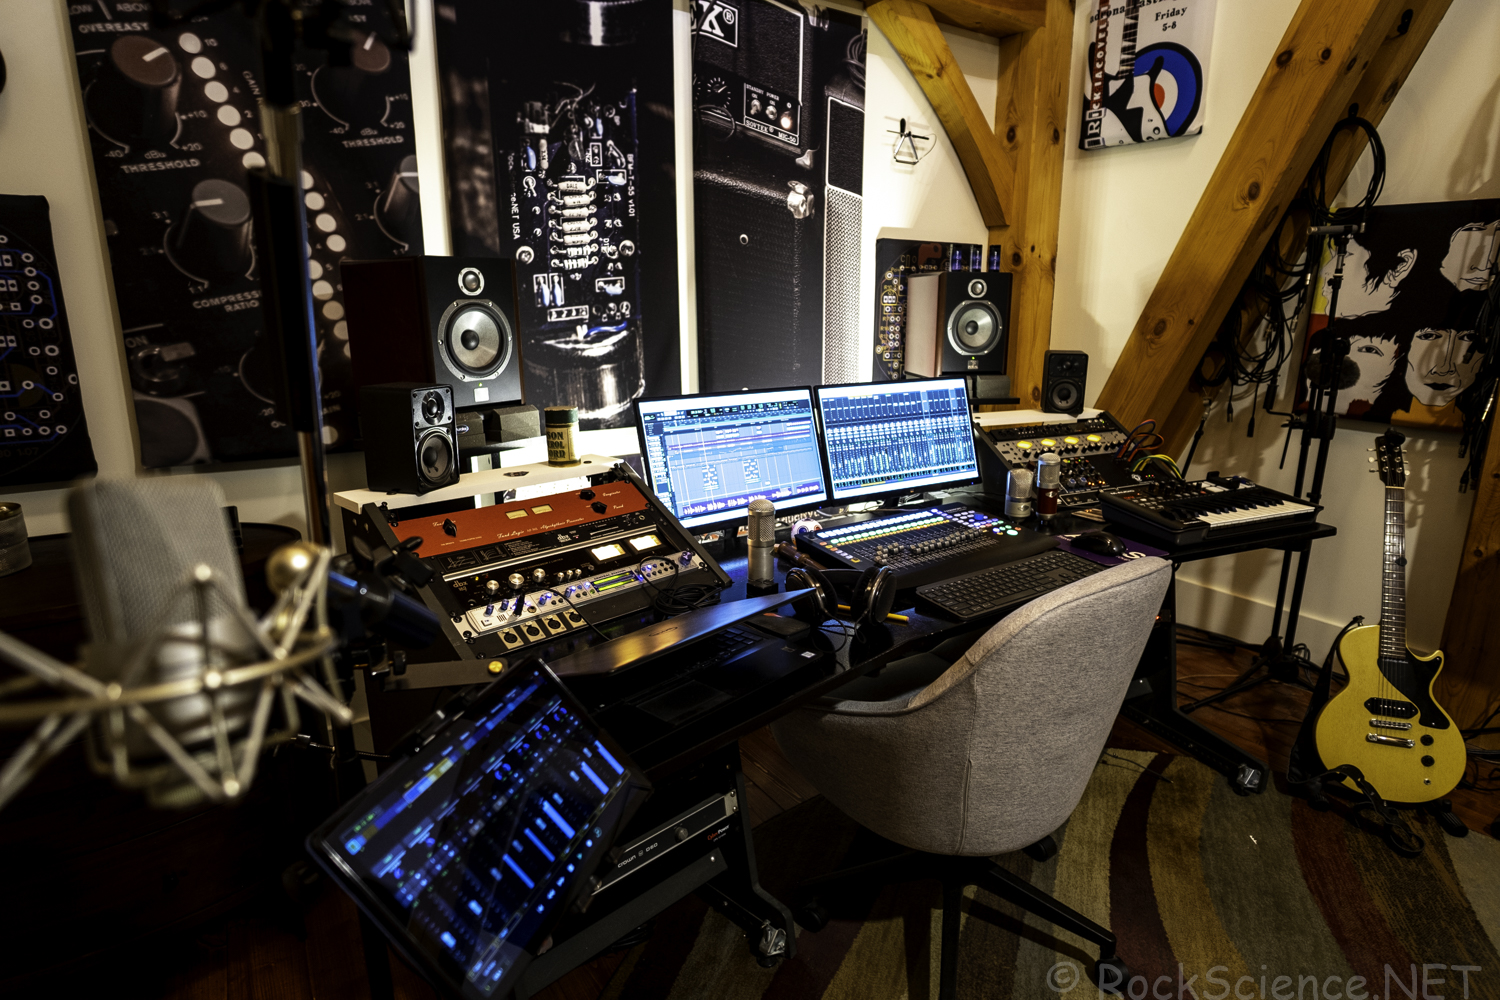
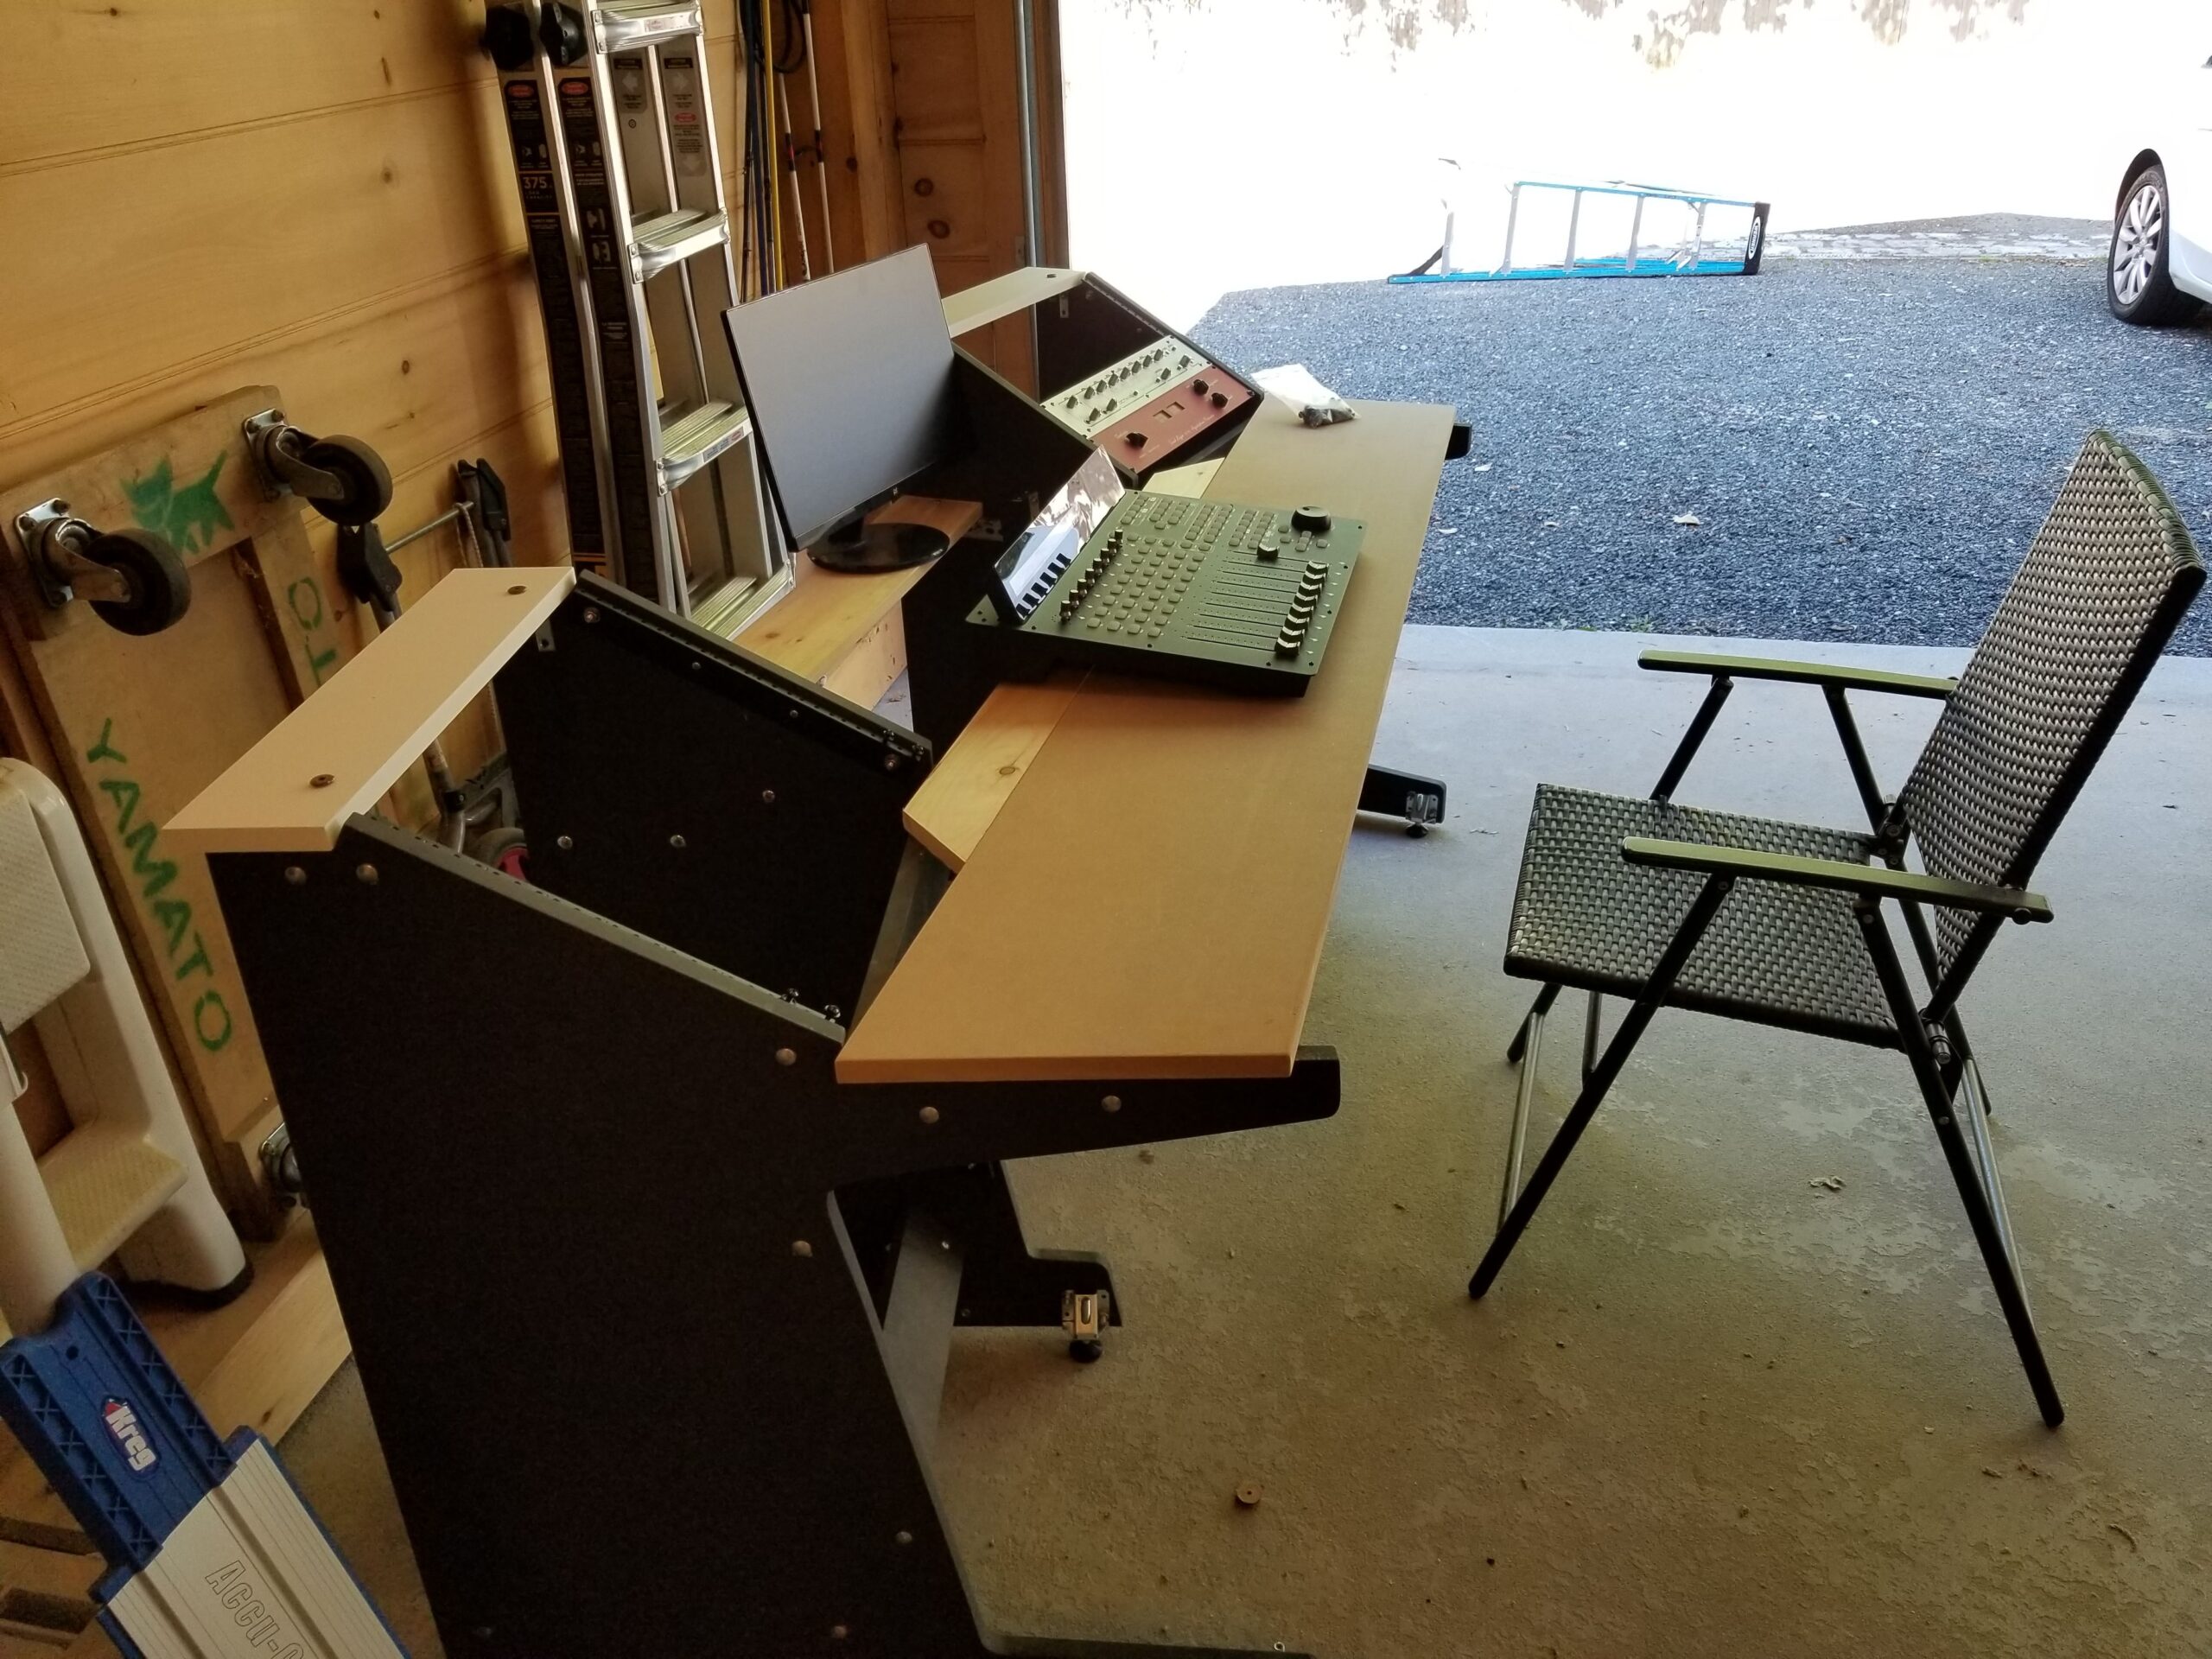
Finished Shot of the desk
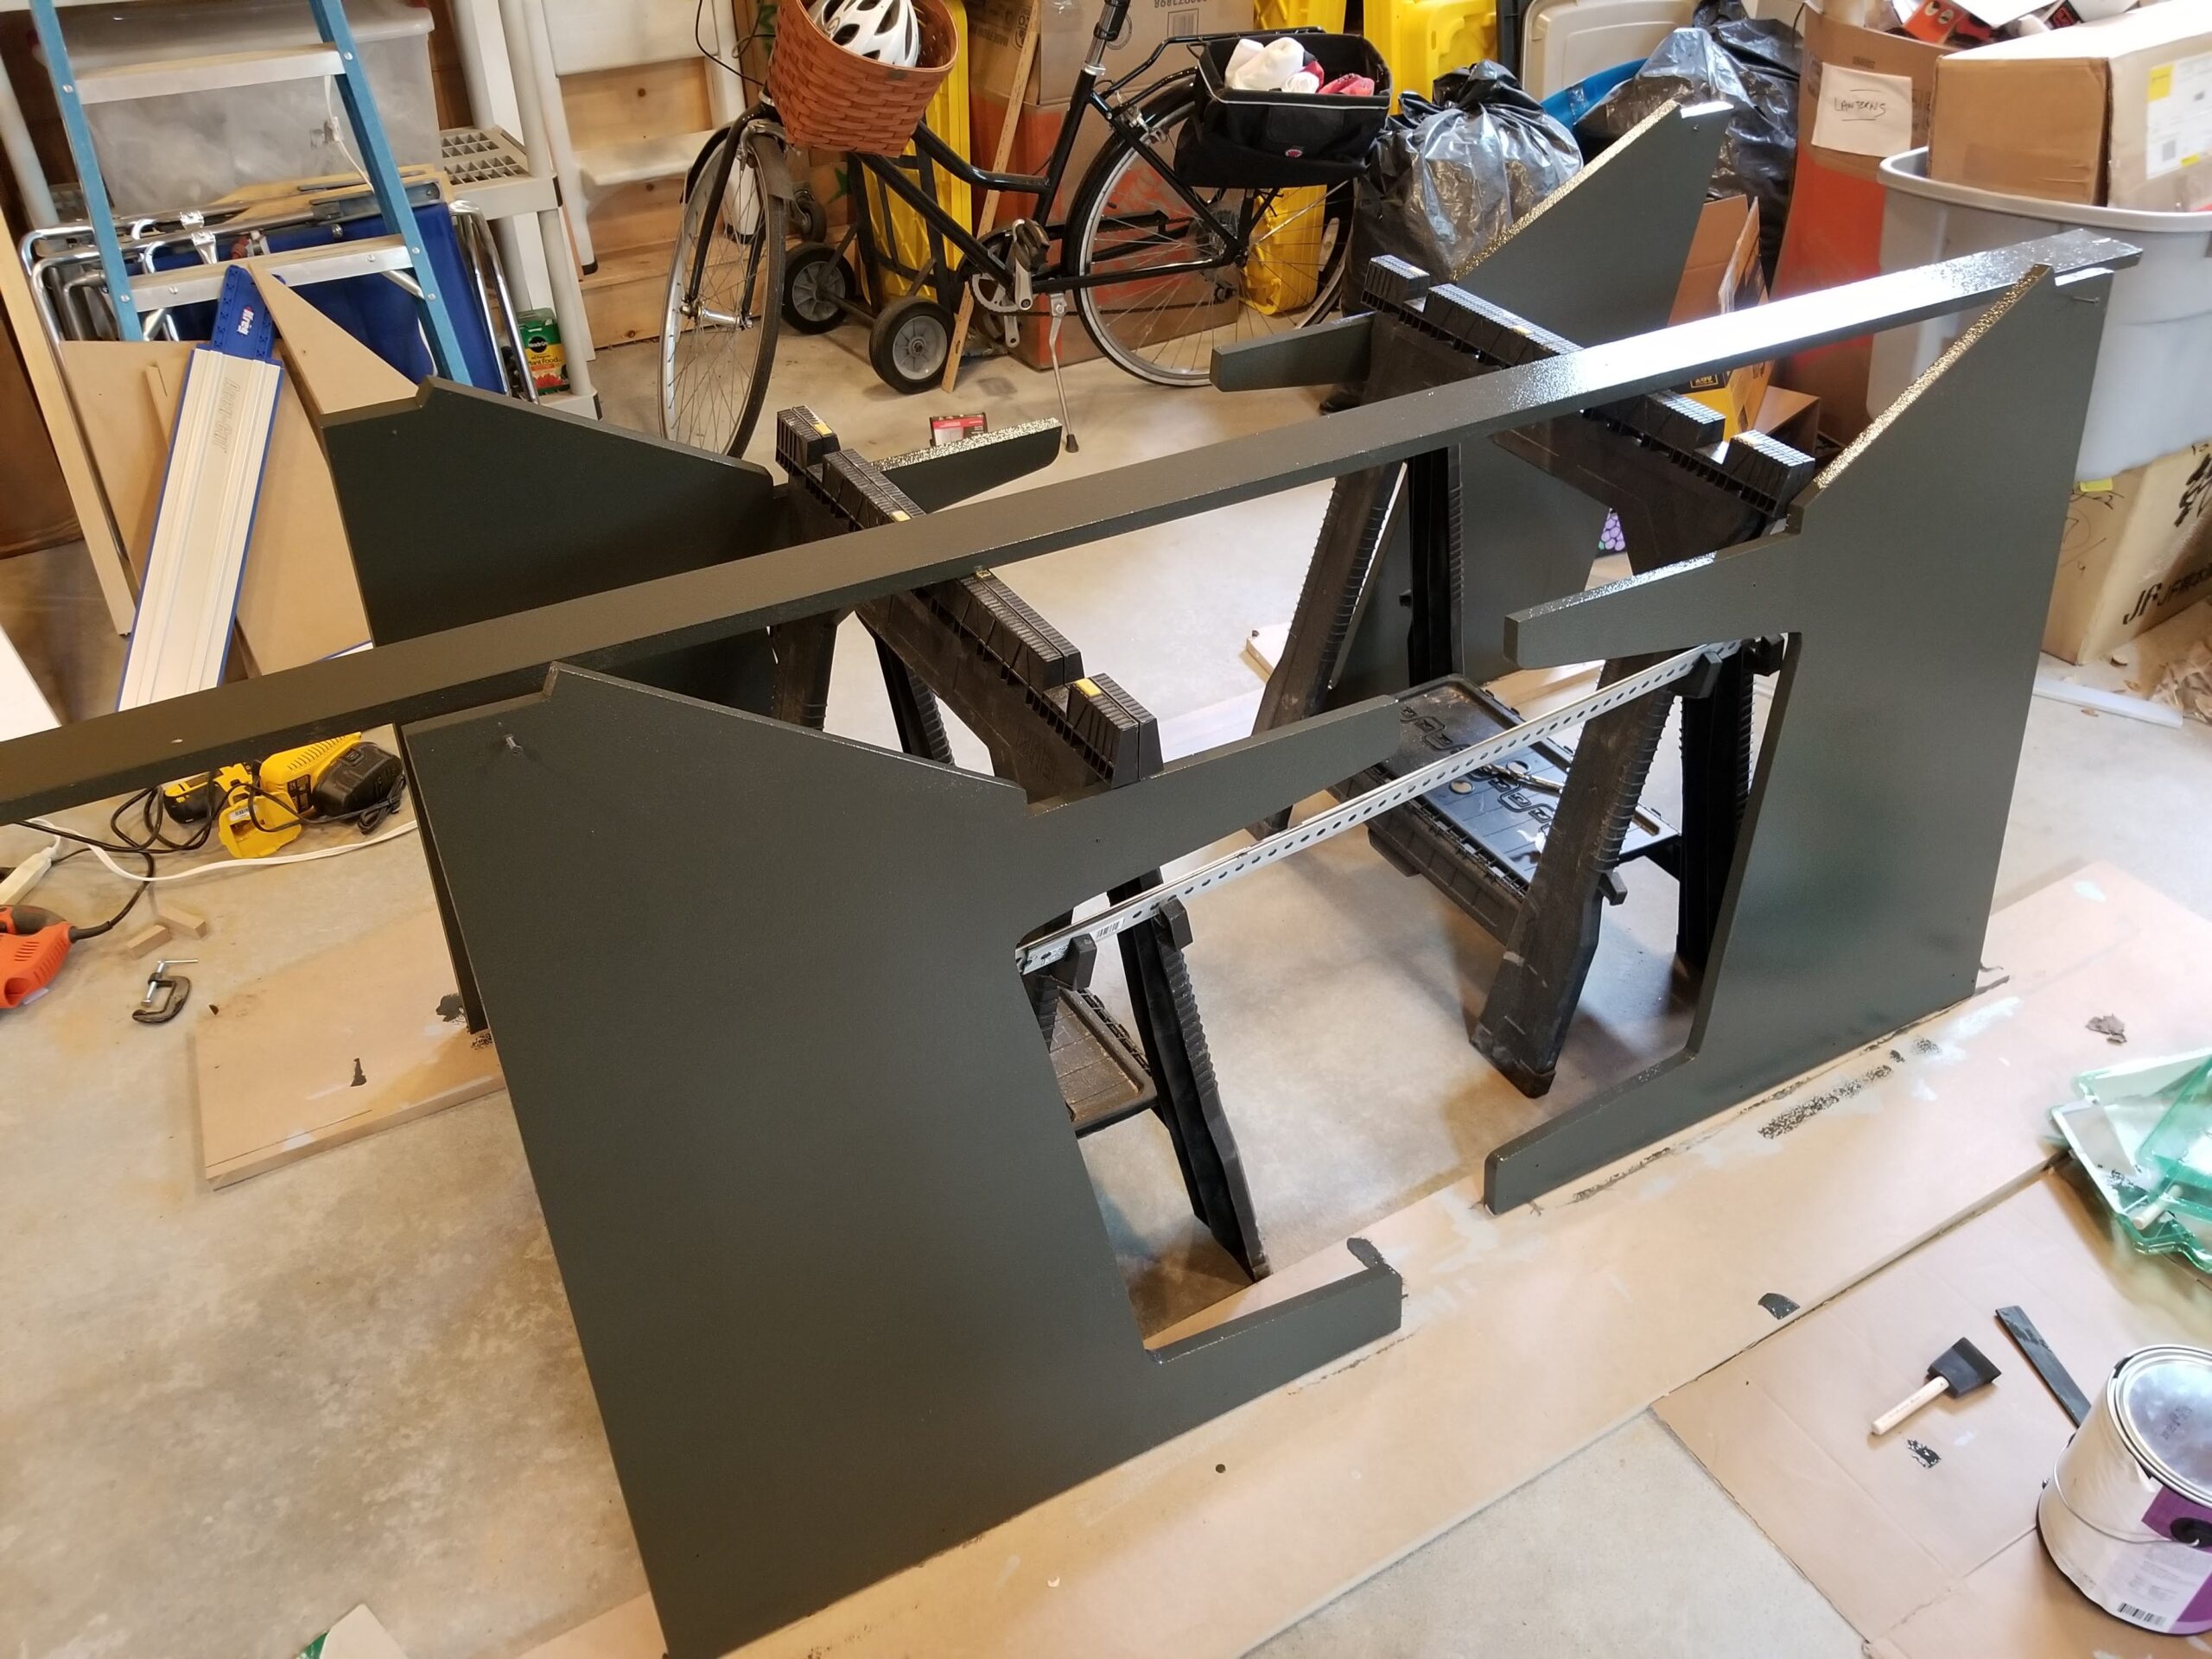
Let’s start with the design
The basic concept was simple: two side wings and a tabletop in between. But one detail I’m especially proud of is how the computer monitors sit on a separate bridge, about 2 inches (52mm) lower than the main desk surface. This gives me a more ergonomic viewing angle and keeps the monitors slightly out of the sound field—something that really matters when you’re trying to maintain a clean monitoring environment in a recording space.
The monitor bridge actually sets the orientation of the side wings. It rests on angle iron mounted to the inside of each wing and is held in place with pins that go through the bridge and into the metal brackets. Simple, sturdy, and effective.
To make sure everything would fit perfectly, I drew the entire desk in LibreCAD, a free open-source CAD tool. This gave me the flexibility to adjust dimensions and get accurate cut measurements before touching a saw.
You can download the DXF file here—it’s free to use if you want to base your own DIY studio desk design on mine.
An export of the DFX CAD file form LibreCAD
Construction
One thing that almost held me back from building this was the fact that I don’t own a table saw. That always made a DIY studio desk feel like it might be out of my league. But honestly, for this build, all you really need is a circular saw with a sharp blade, a straight edge, and some sturdy clamps. It’s totally doable with basic tools.
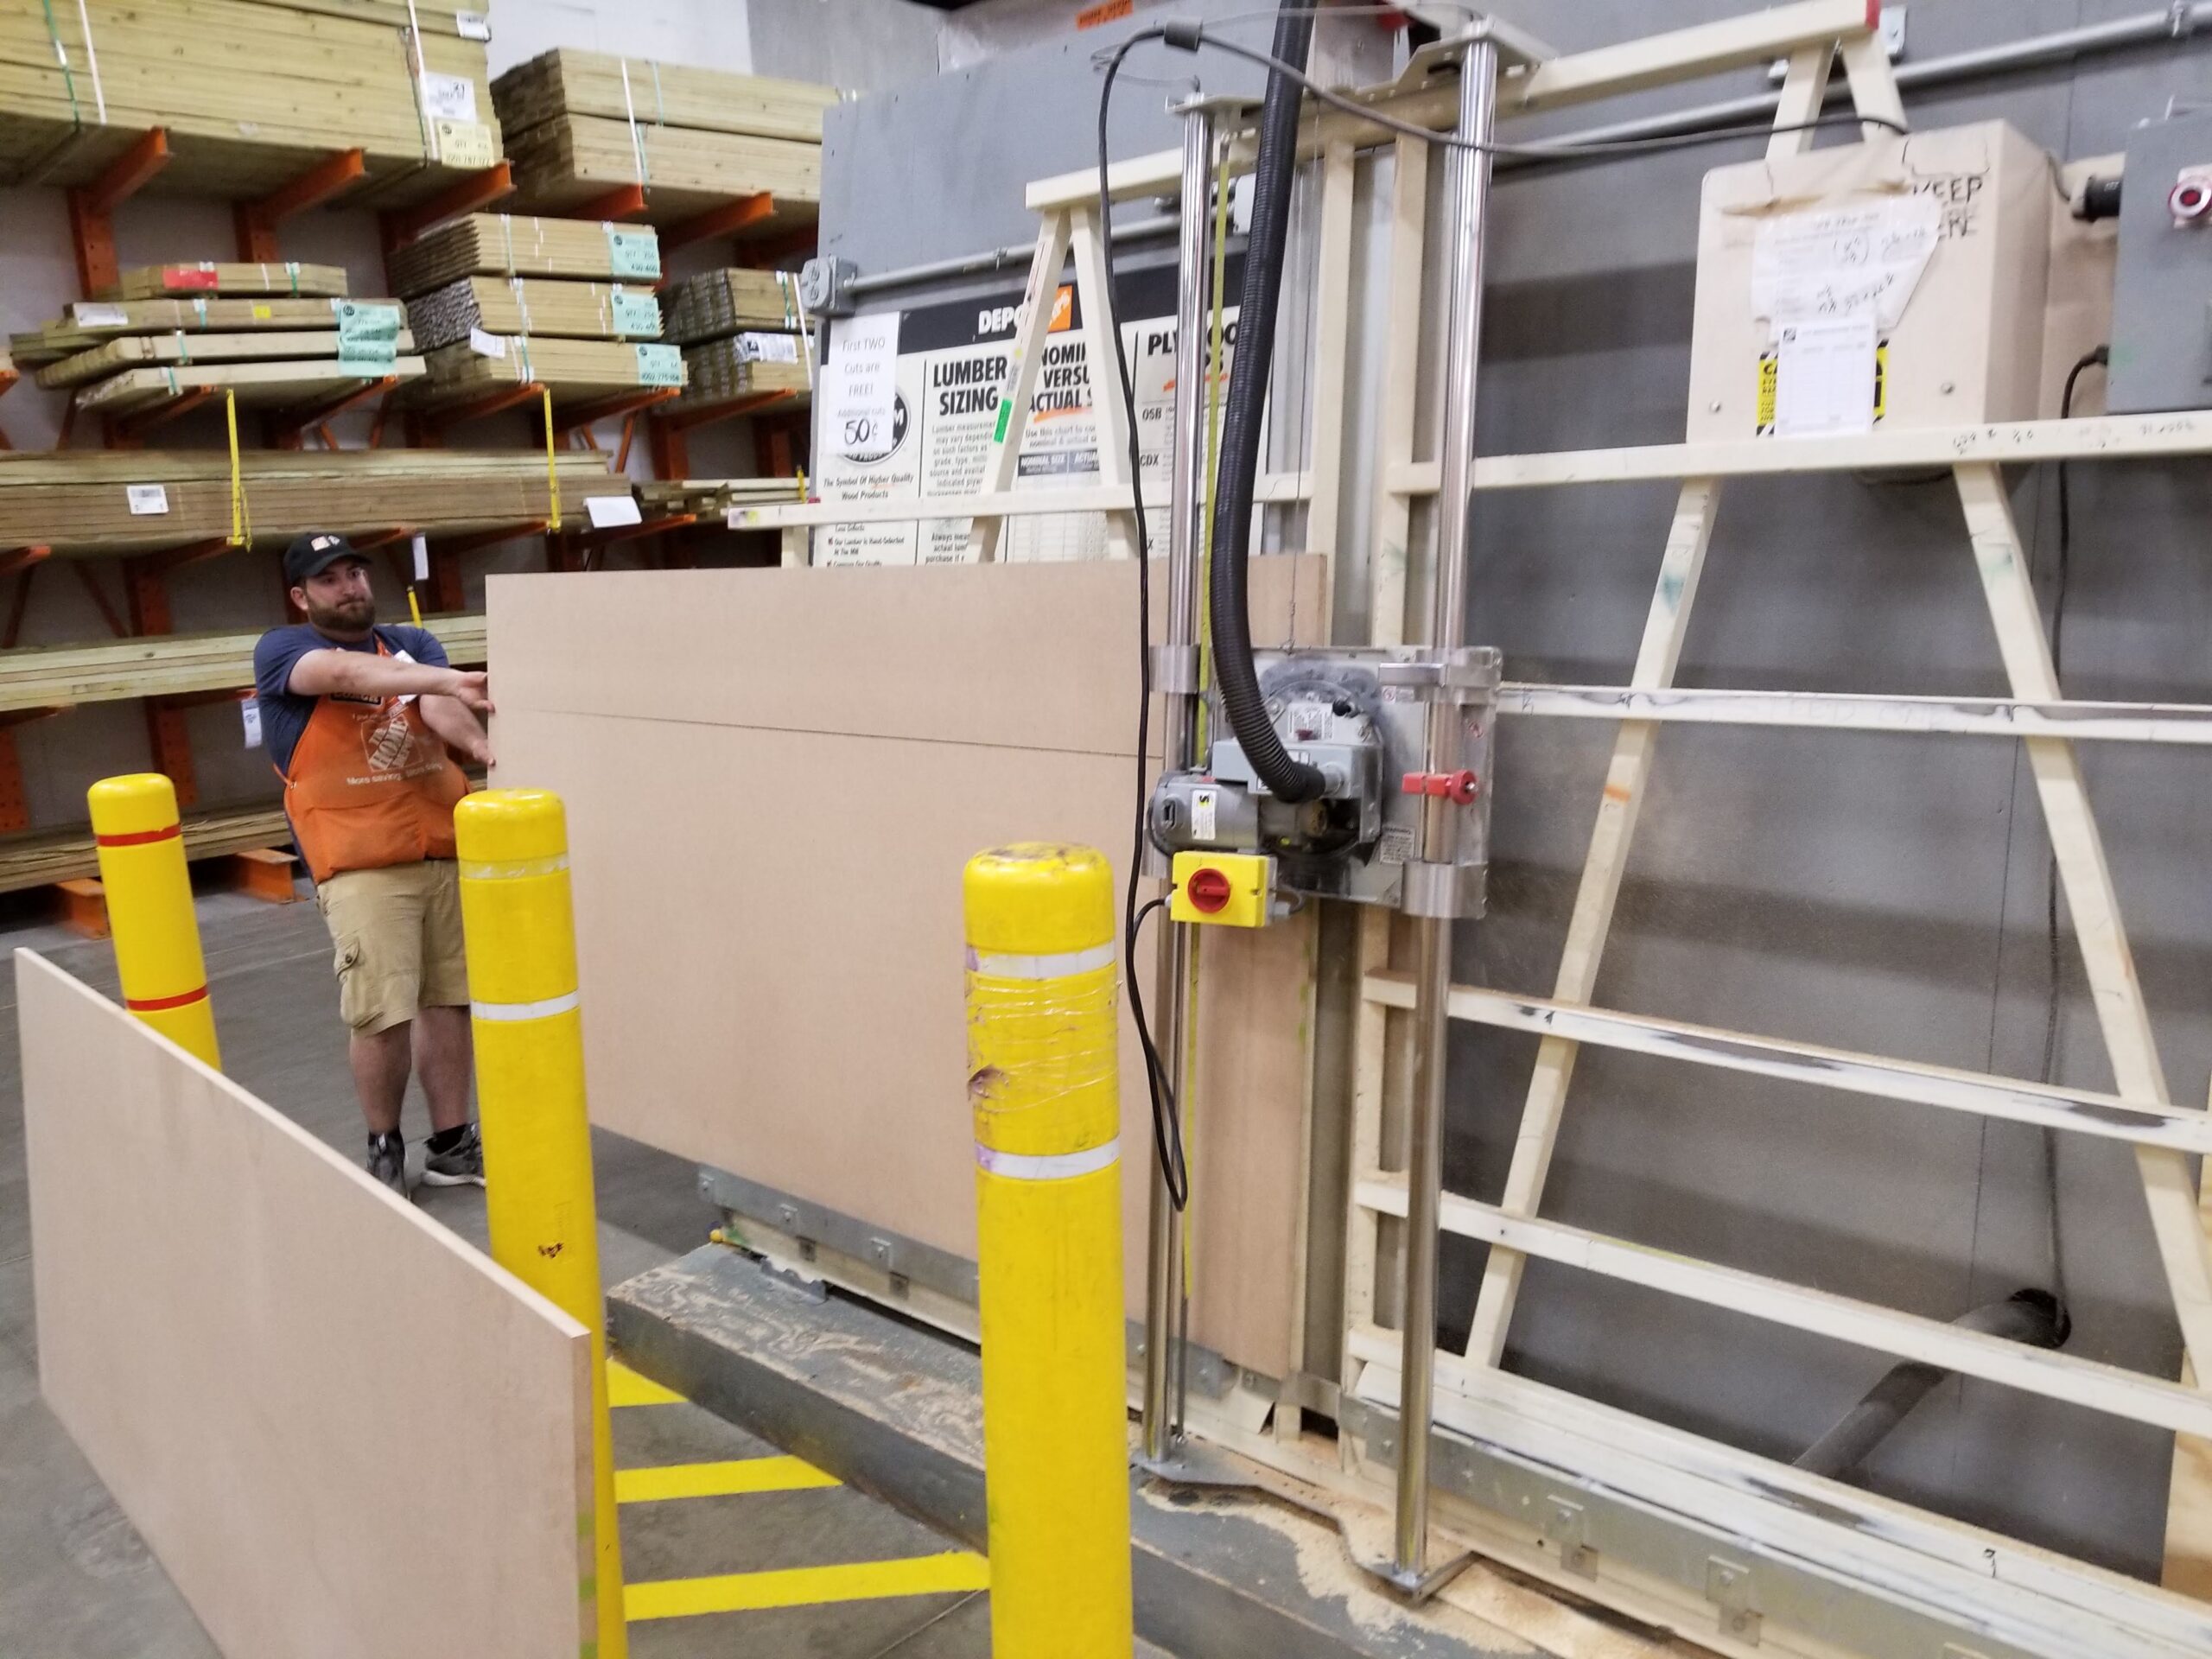
I worked directly from my CAD drawing and cut the various MDF pieces to size. To make things more manageable (and to fit everything in my car—I don’t have a truck either), I had the sheets rough-cut at Home Depot. That made transport and final trimming at home much easier.
Rough Cuts at Home DepotPaperless ShopDetails
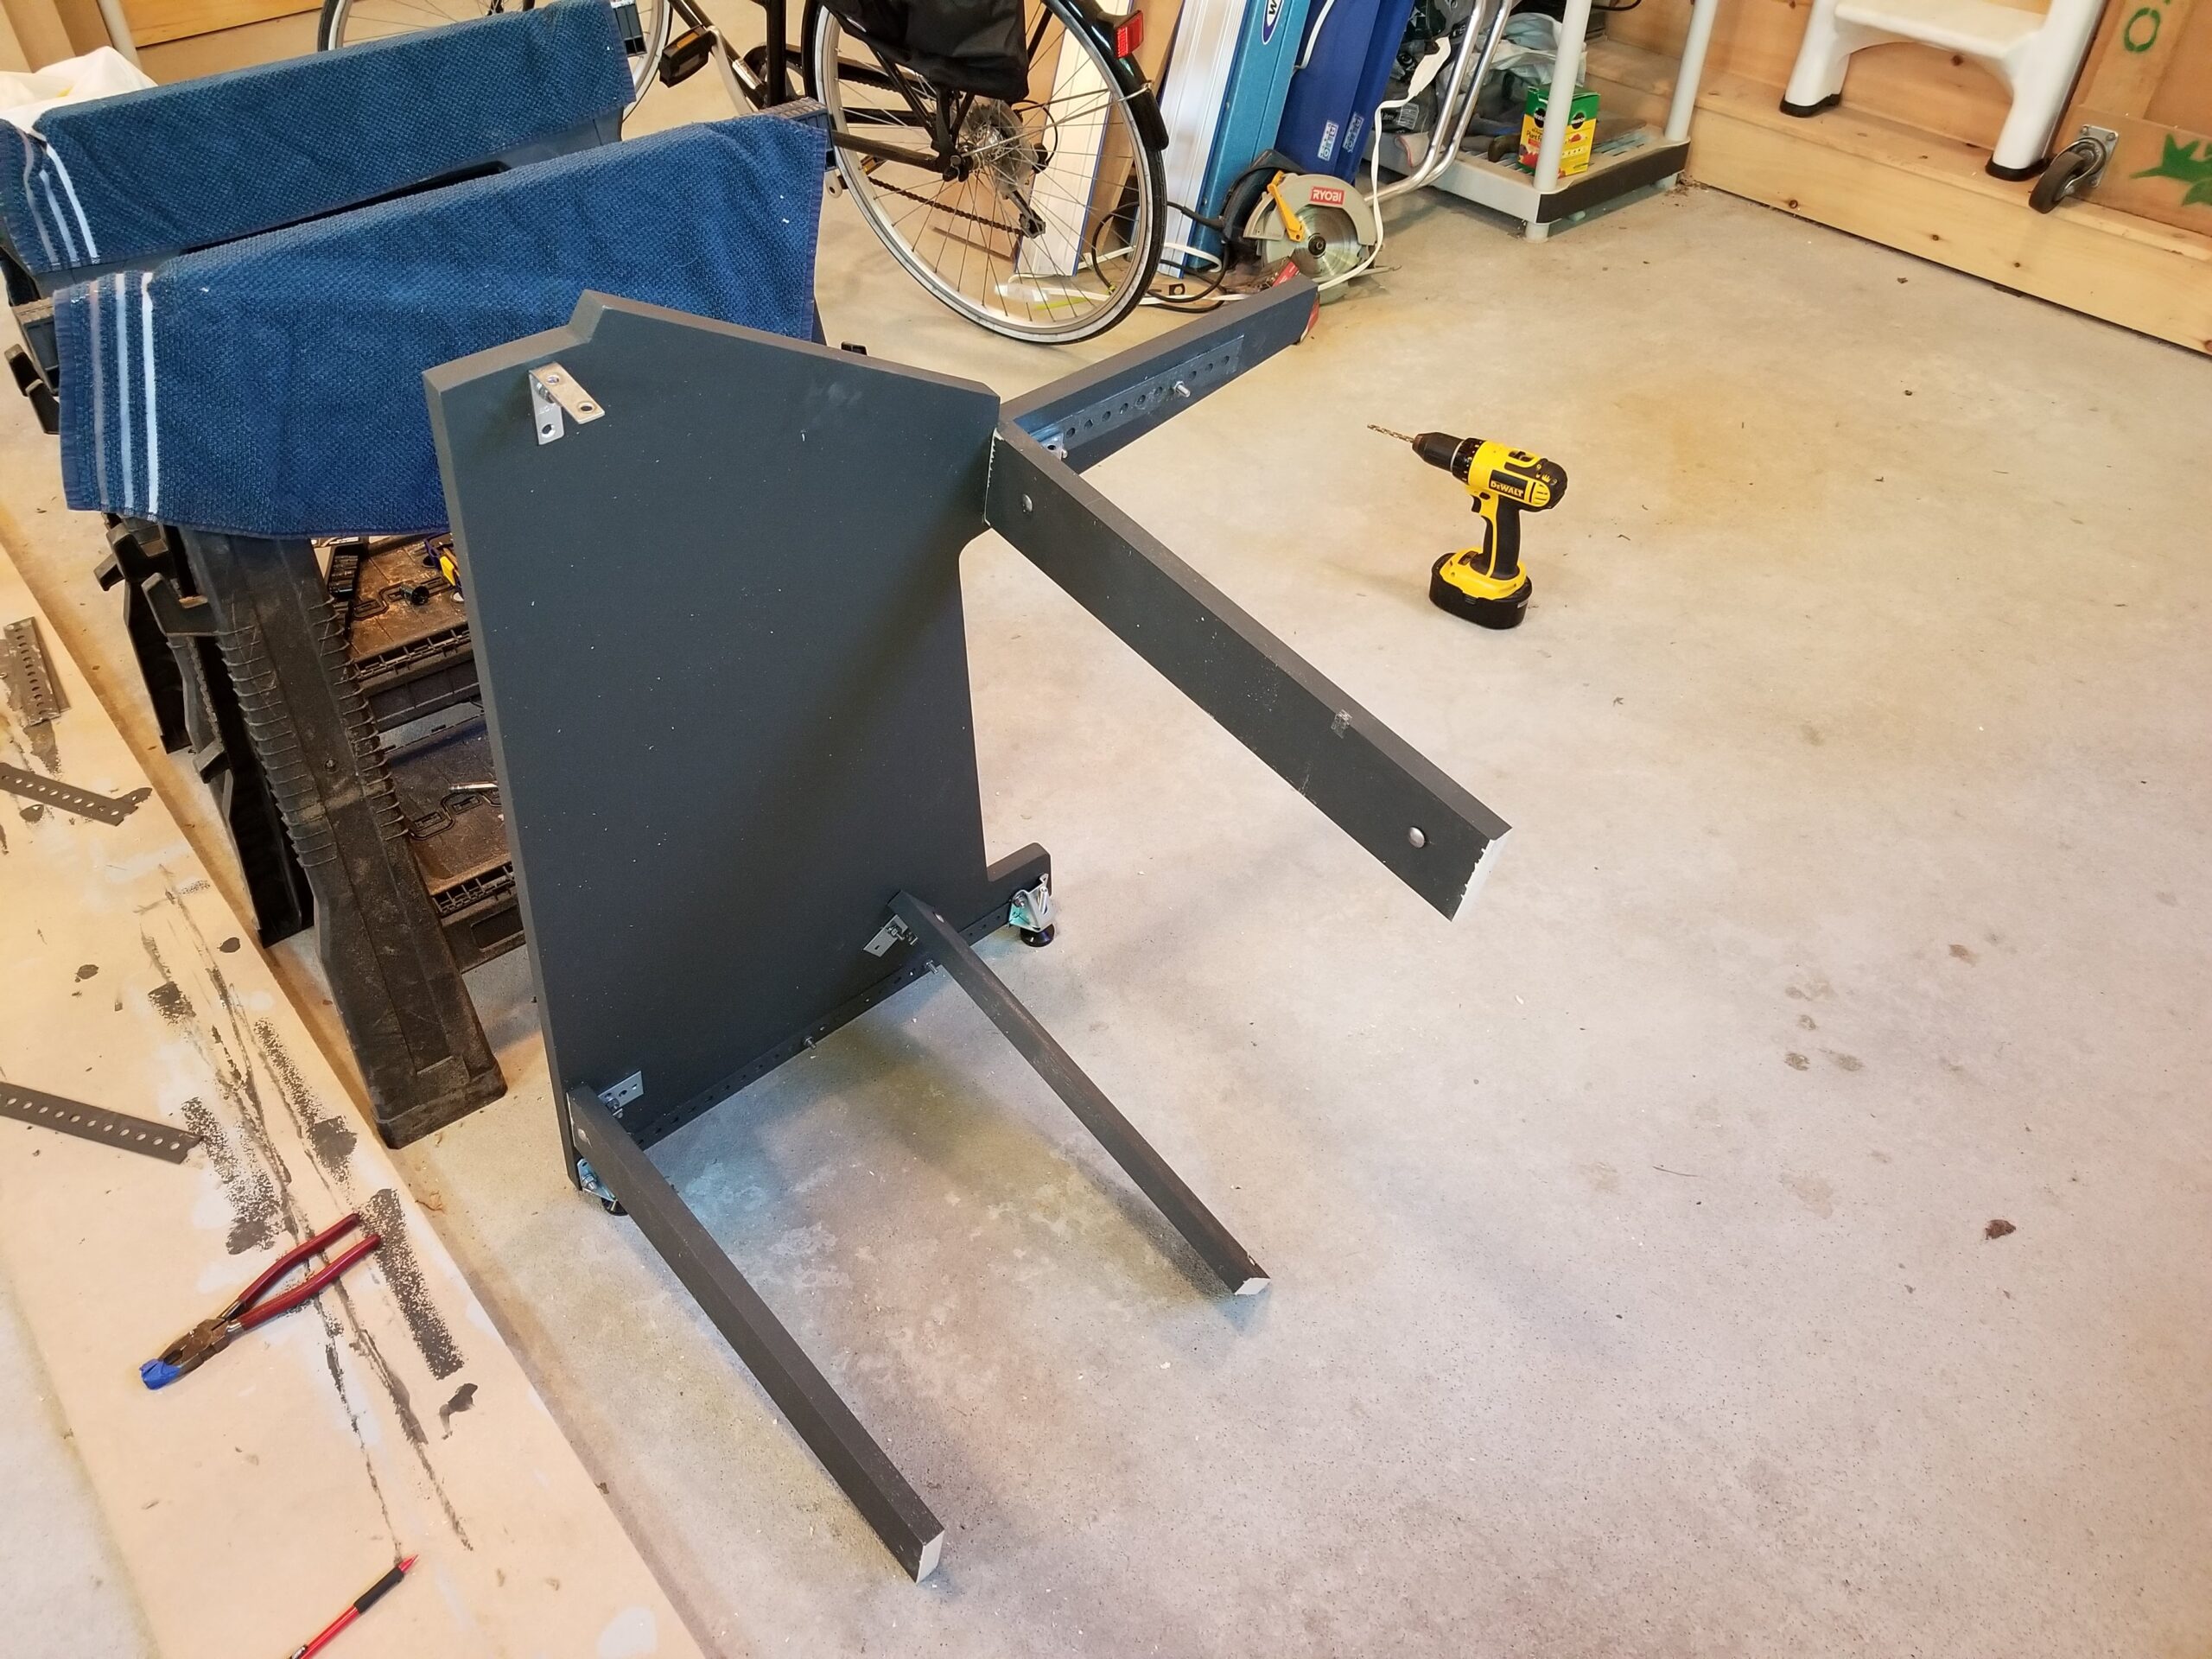
The cutting and sanding of the side wing pieces went surprisingly fast. Once those were done, I moved on to the cross pieces, internal supports, brackets, leveling pads, and other hardware. That’s when progress started to slow down.
In hindsight, I really wish I had spent more time in the planning phase—specifically designing the bracket placement and leveling pad locations in CAD. It would’ve saved me a lot of trial and error (and a few ruined pieces of MDF). Lesson learned: the more detailed your design is up front, the smoother the build goes later.
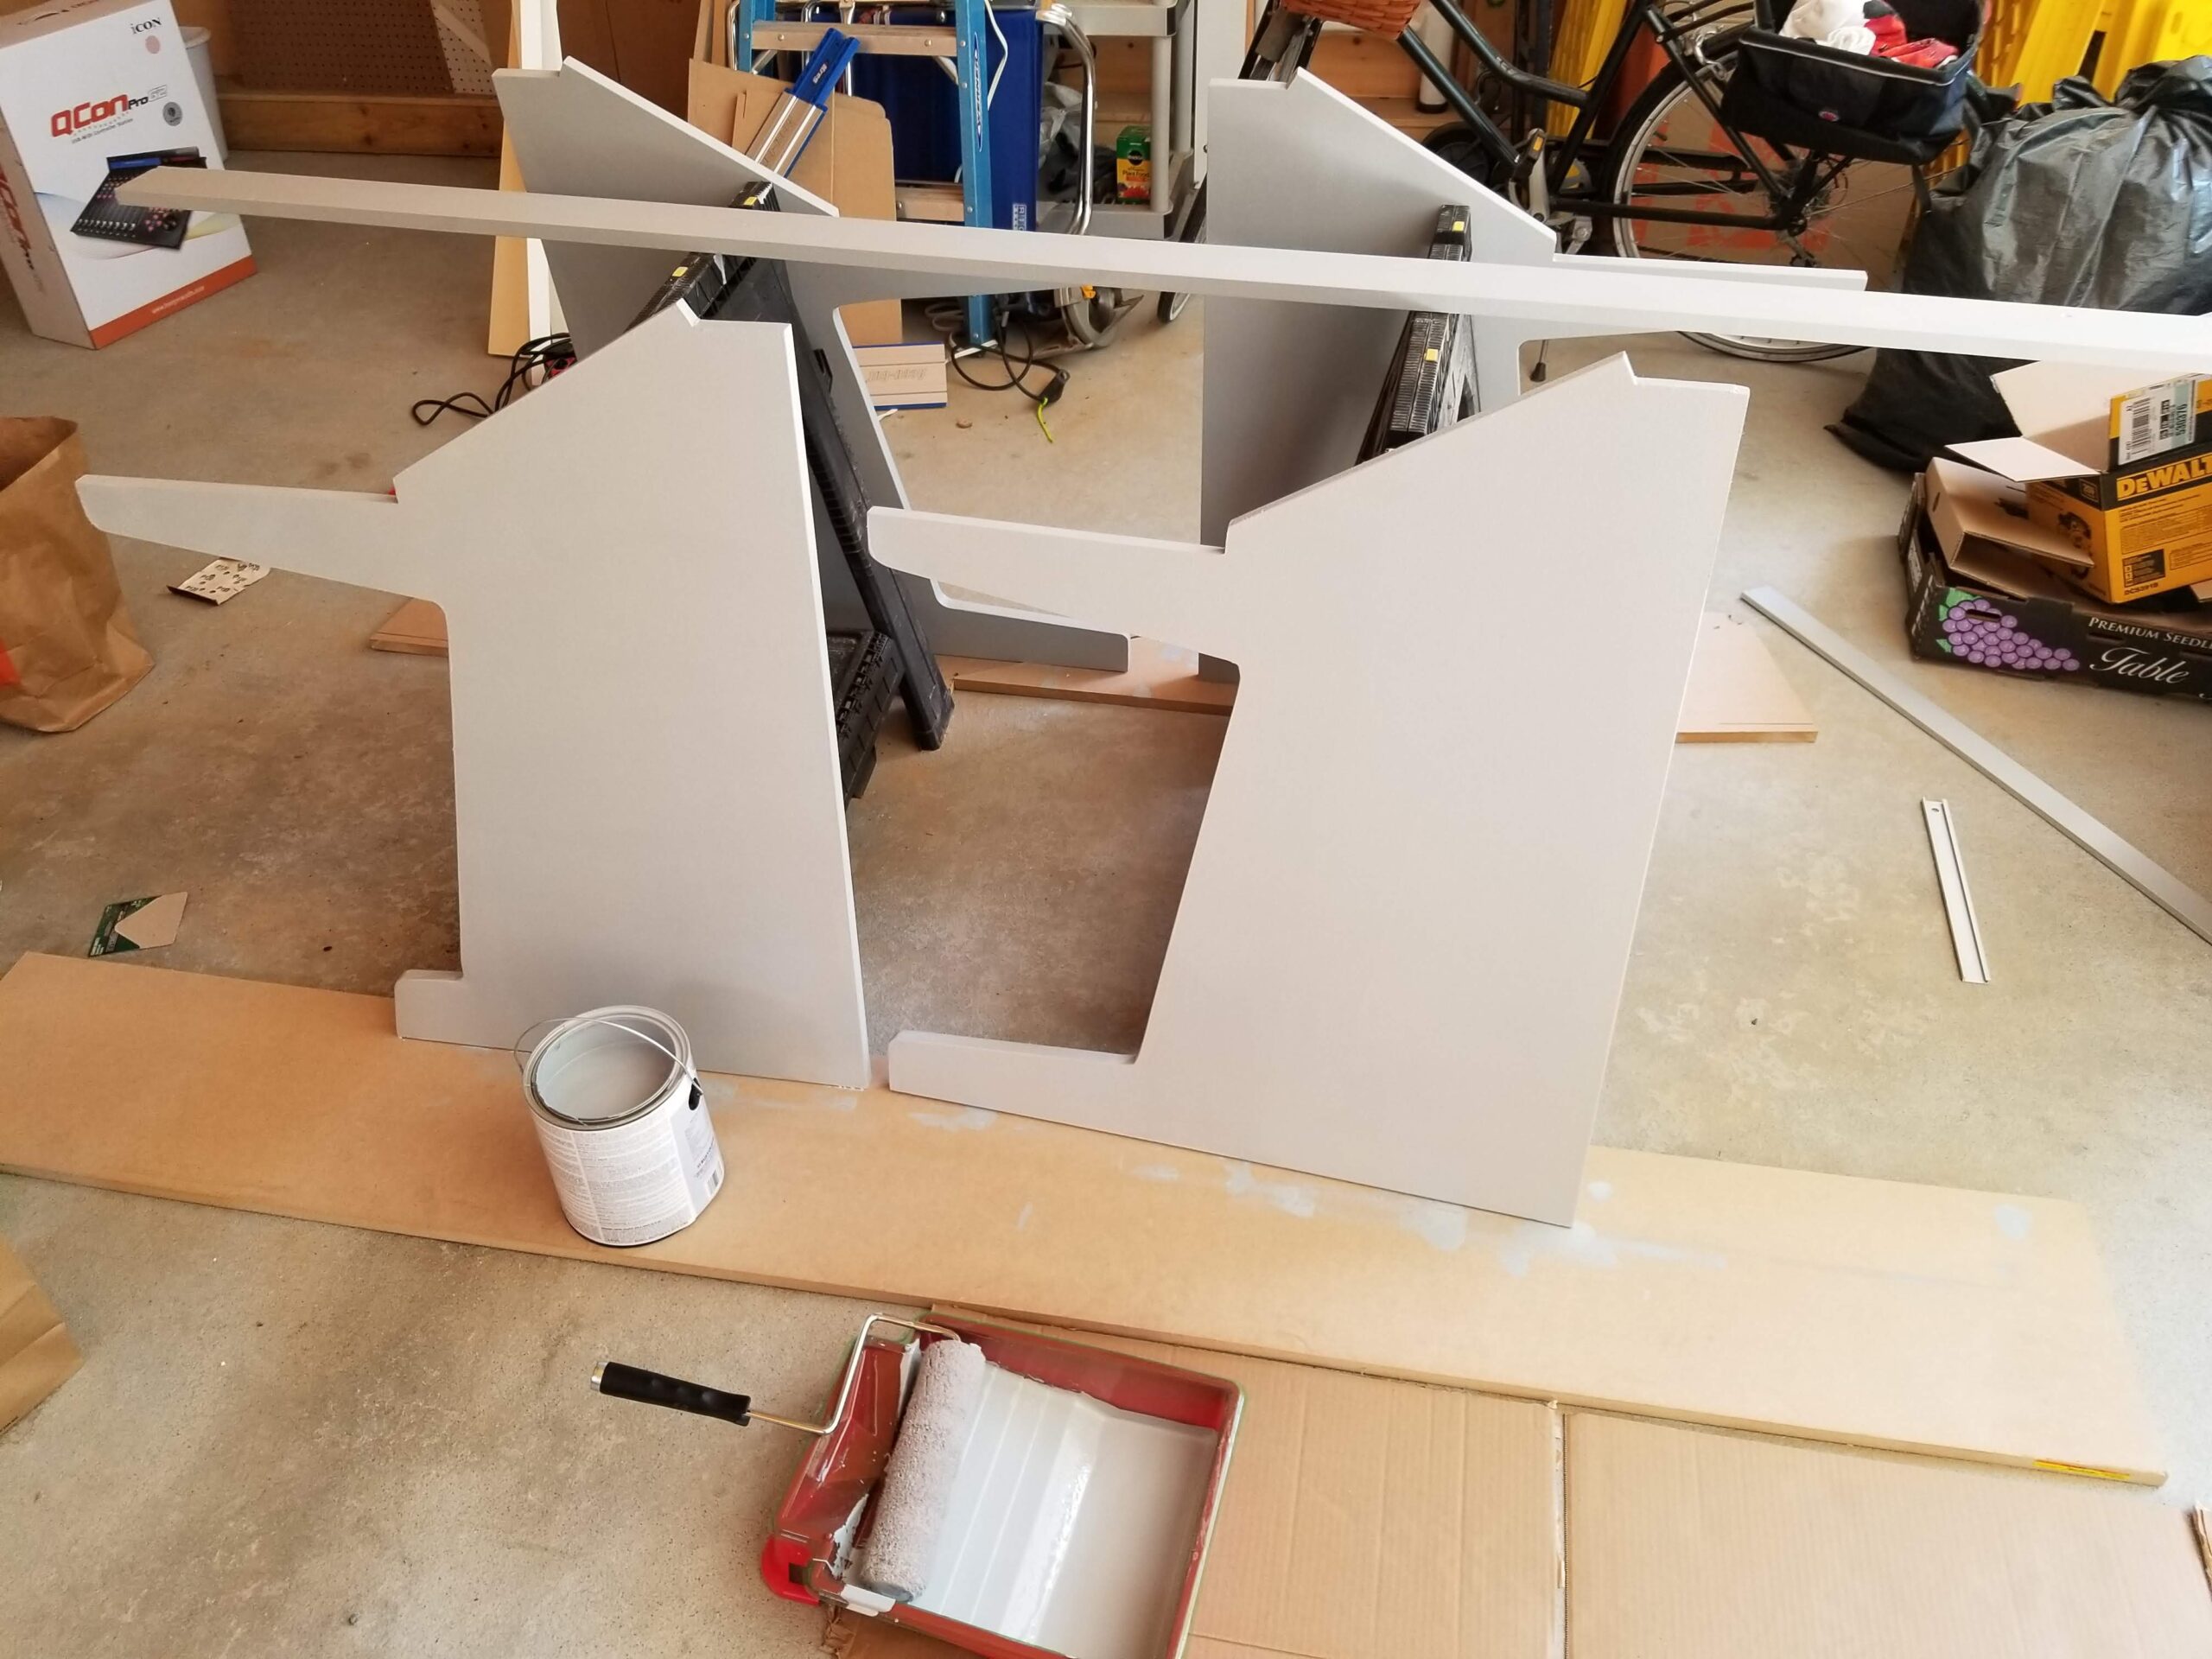
Priming and PaintingProof of Concept AssemblyProof of Concept Assemblylaying out the brackets and supportsassembling a side wingmostly assembledthe rough layoutrough layout
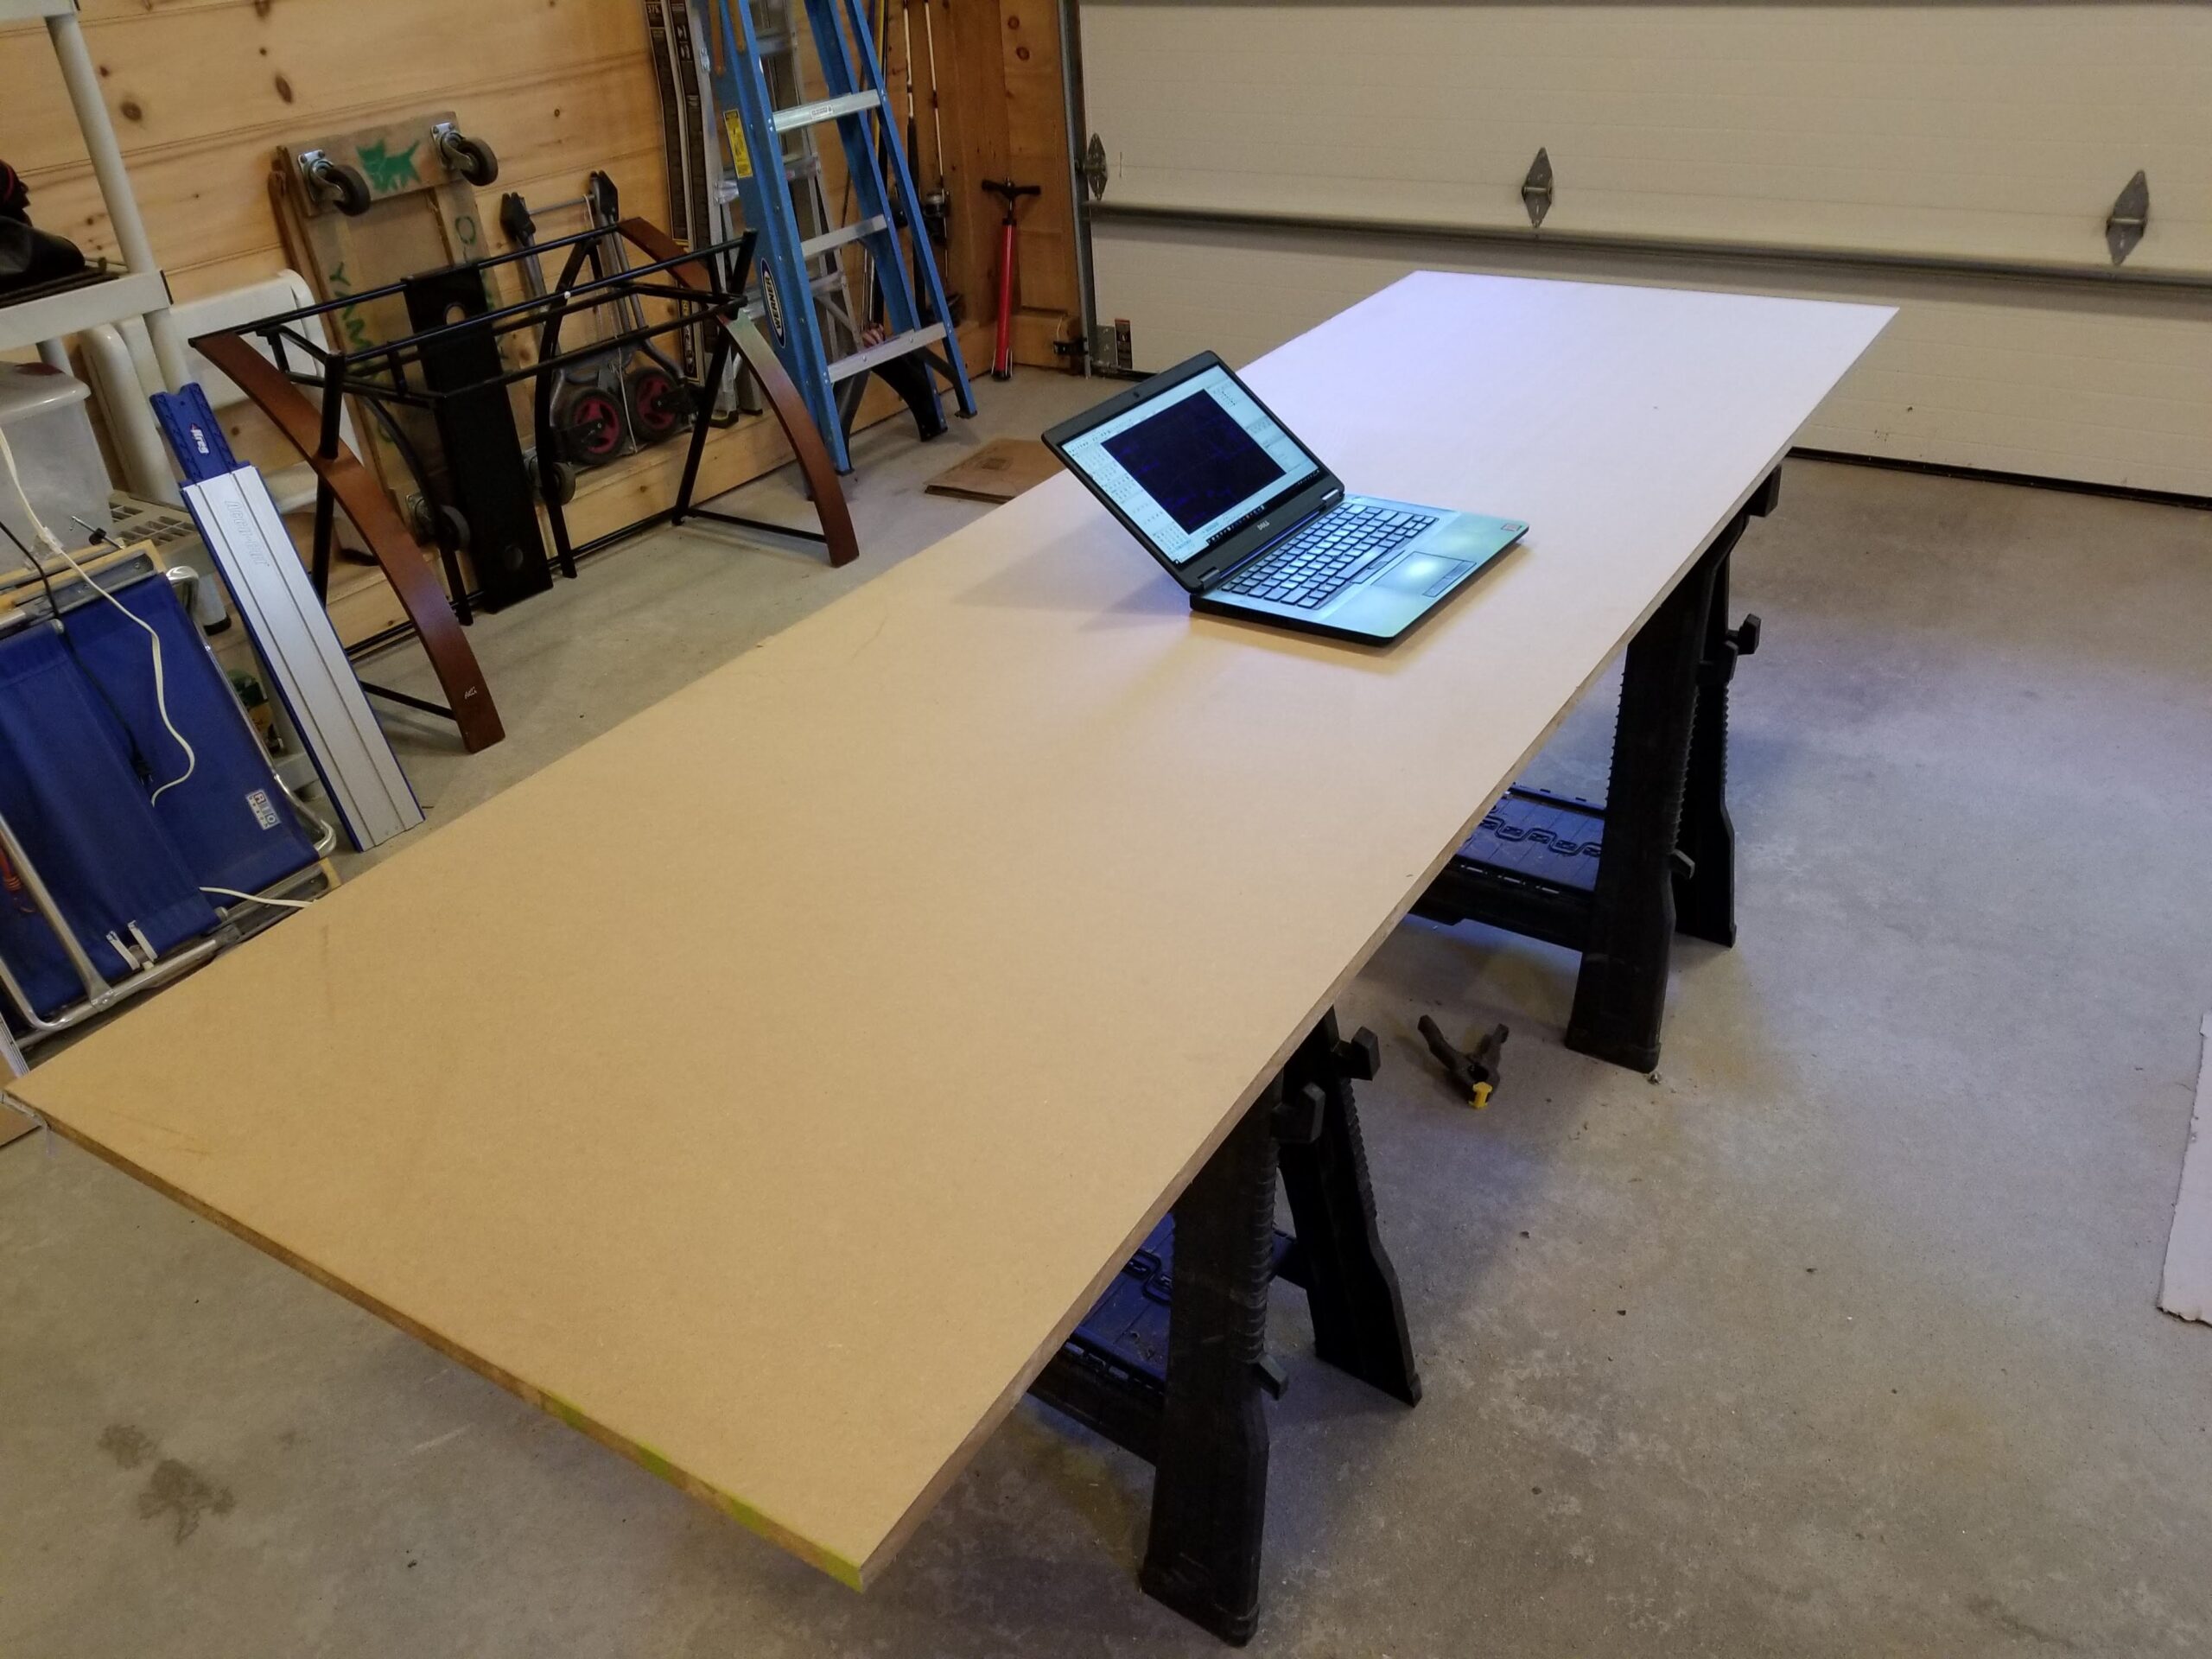
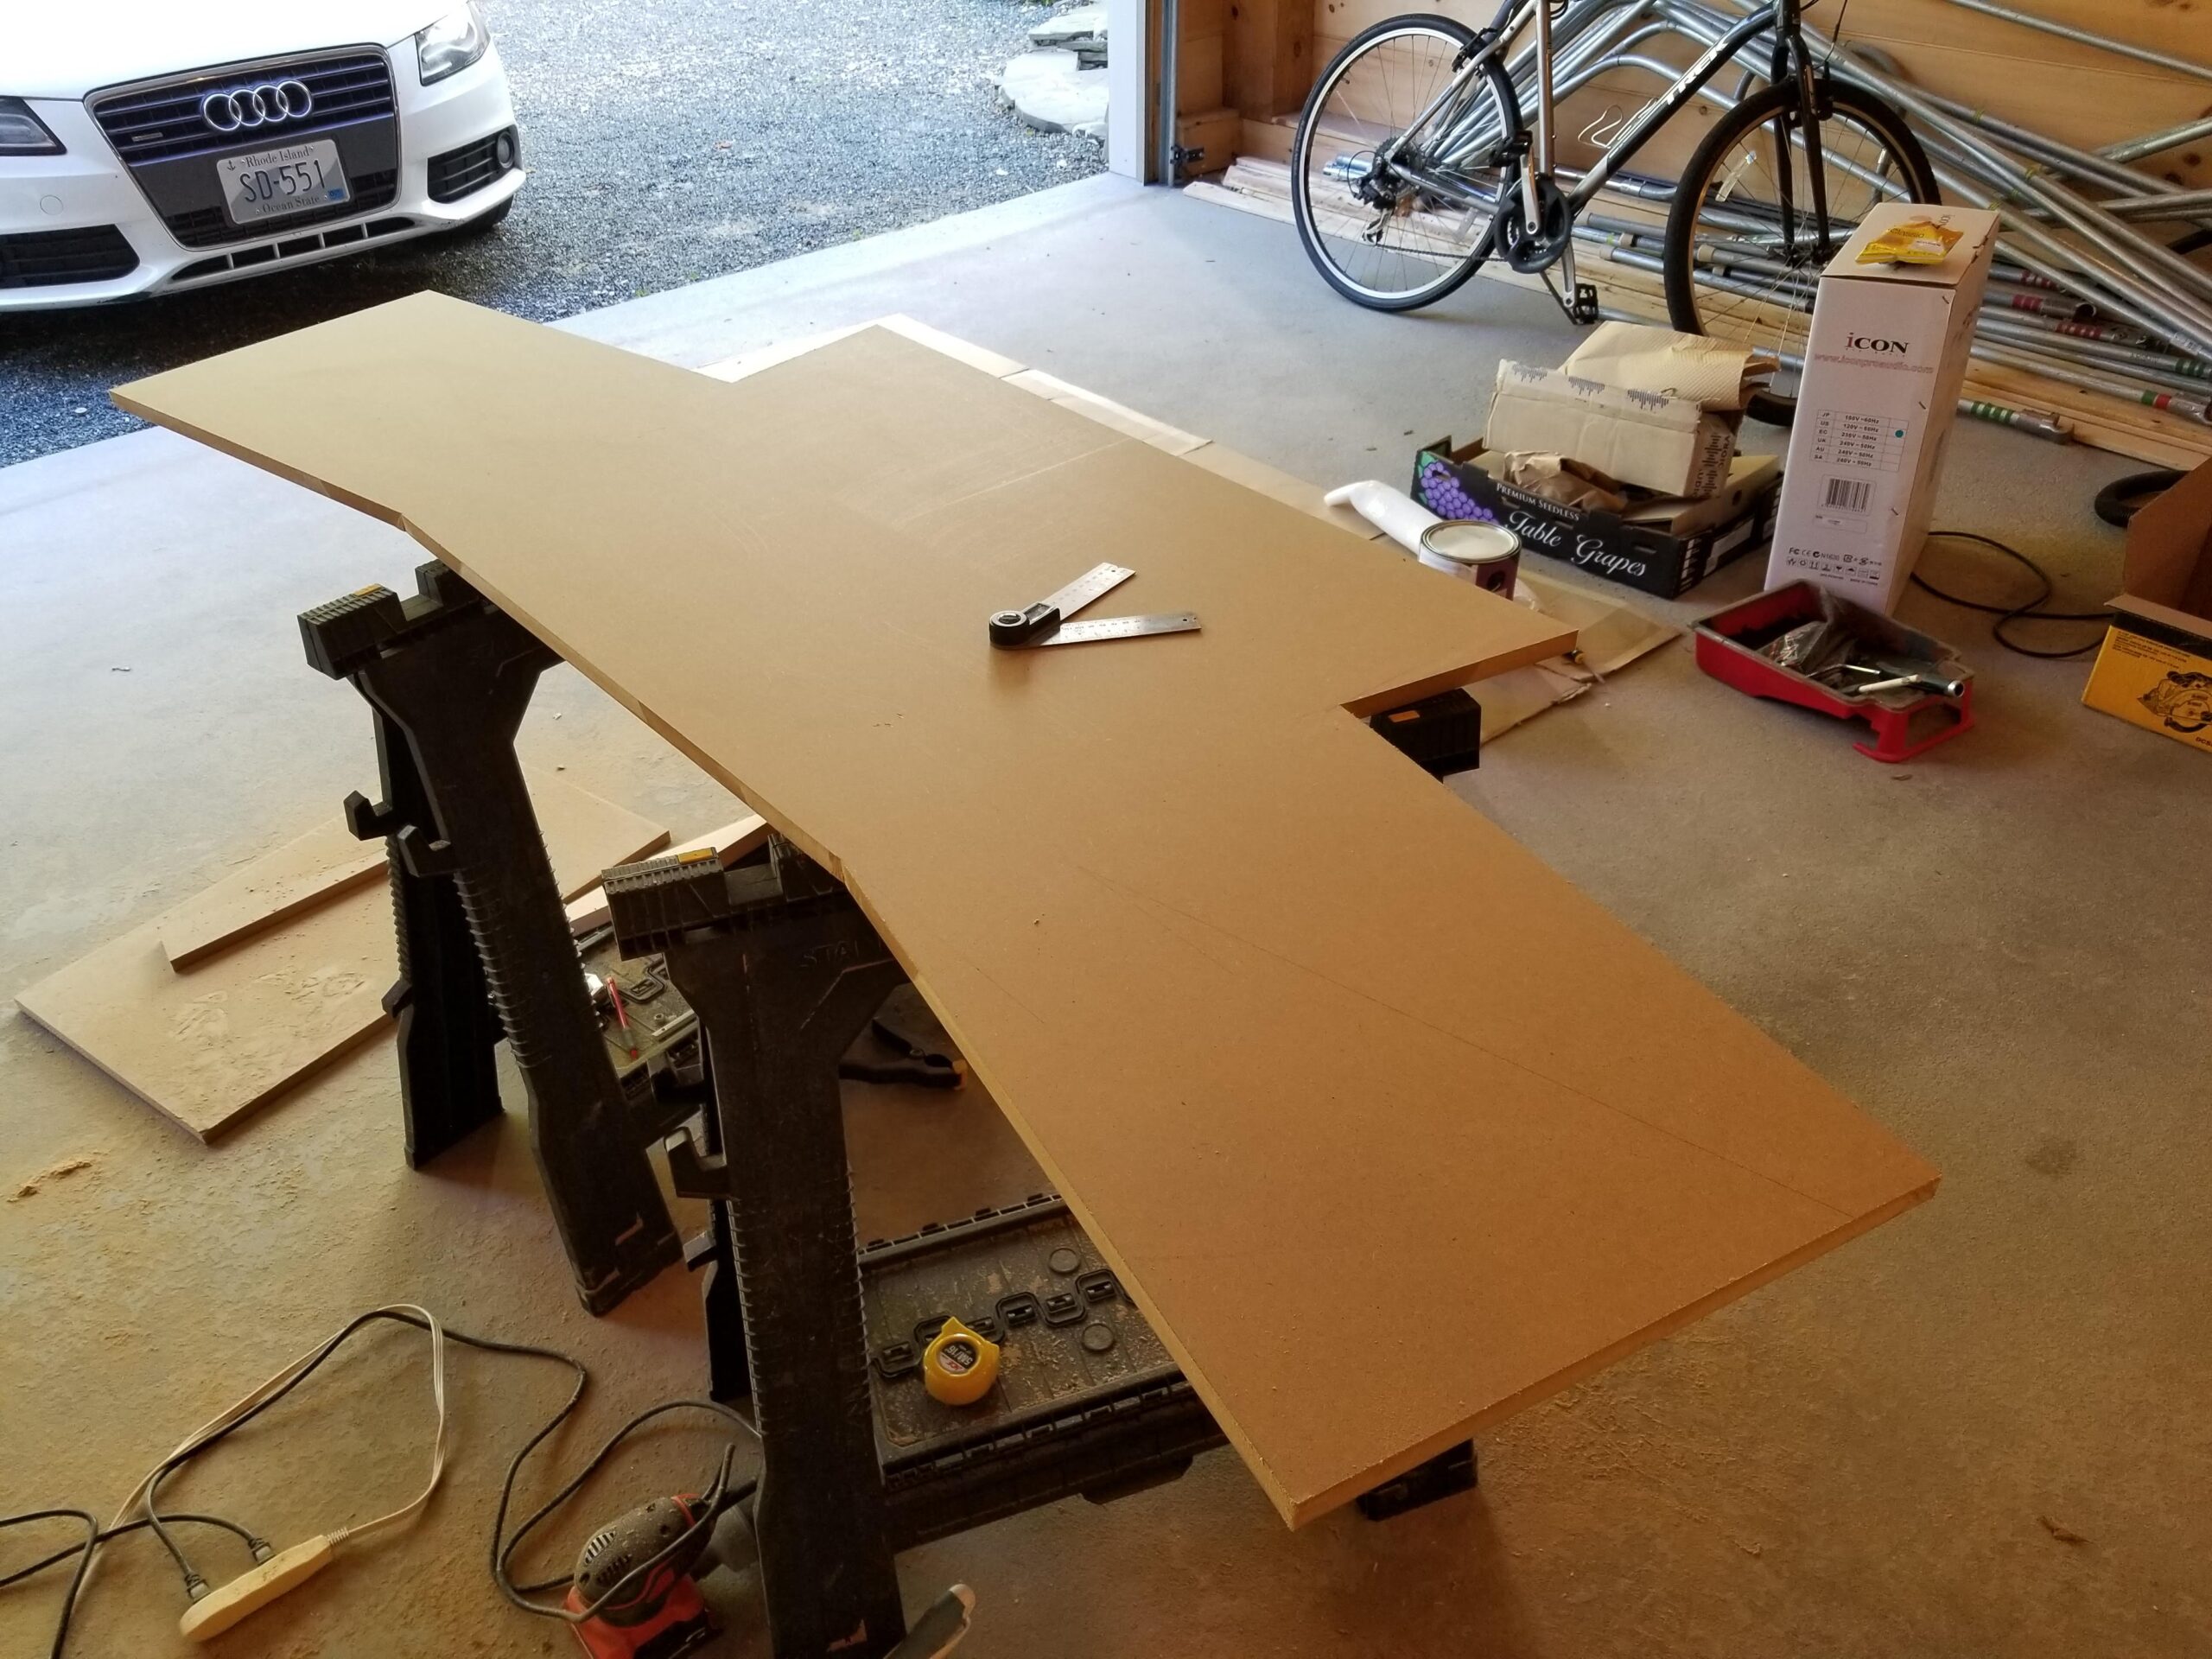
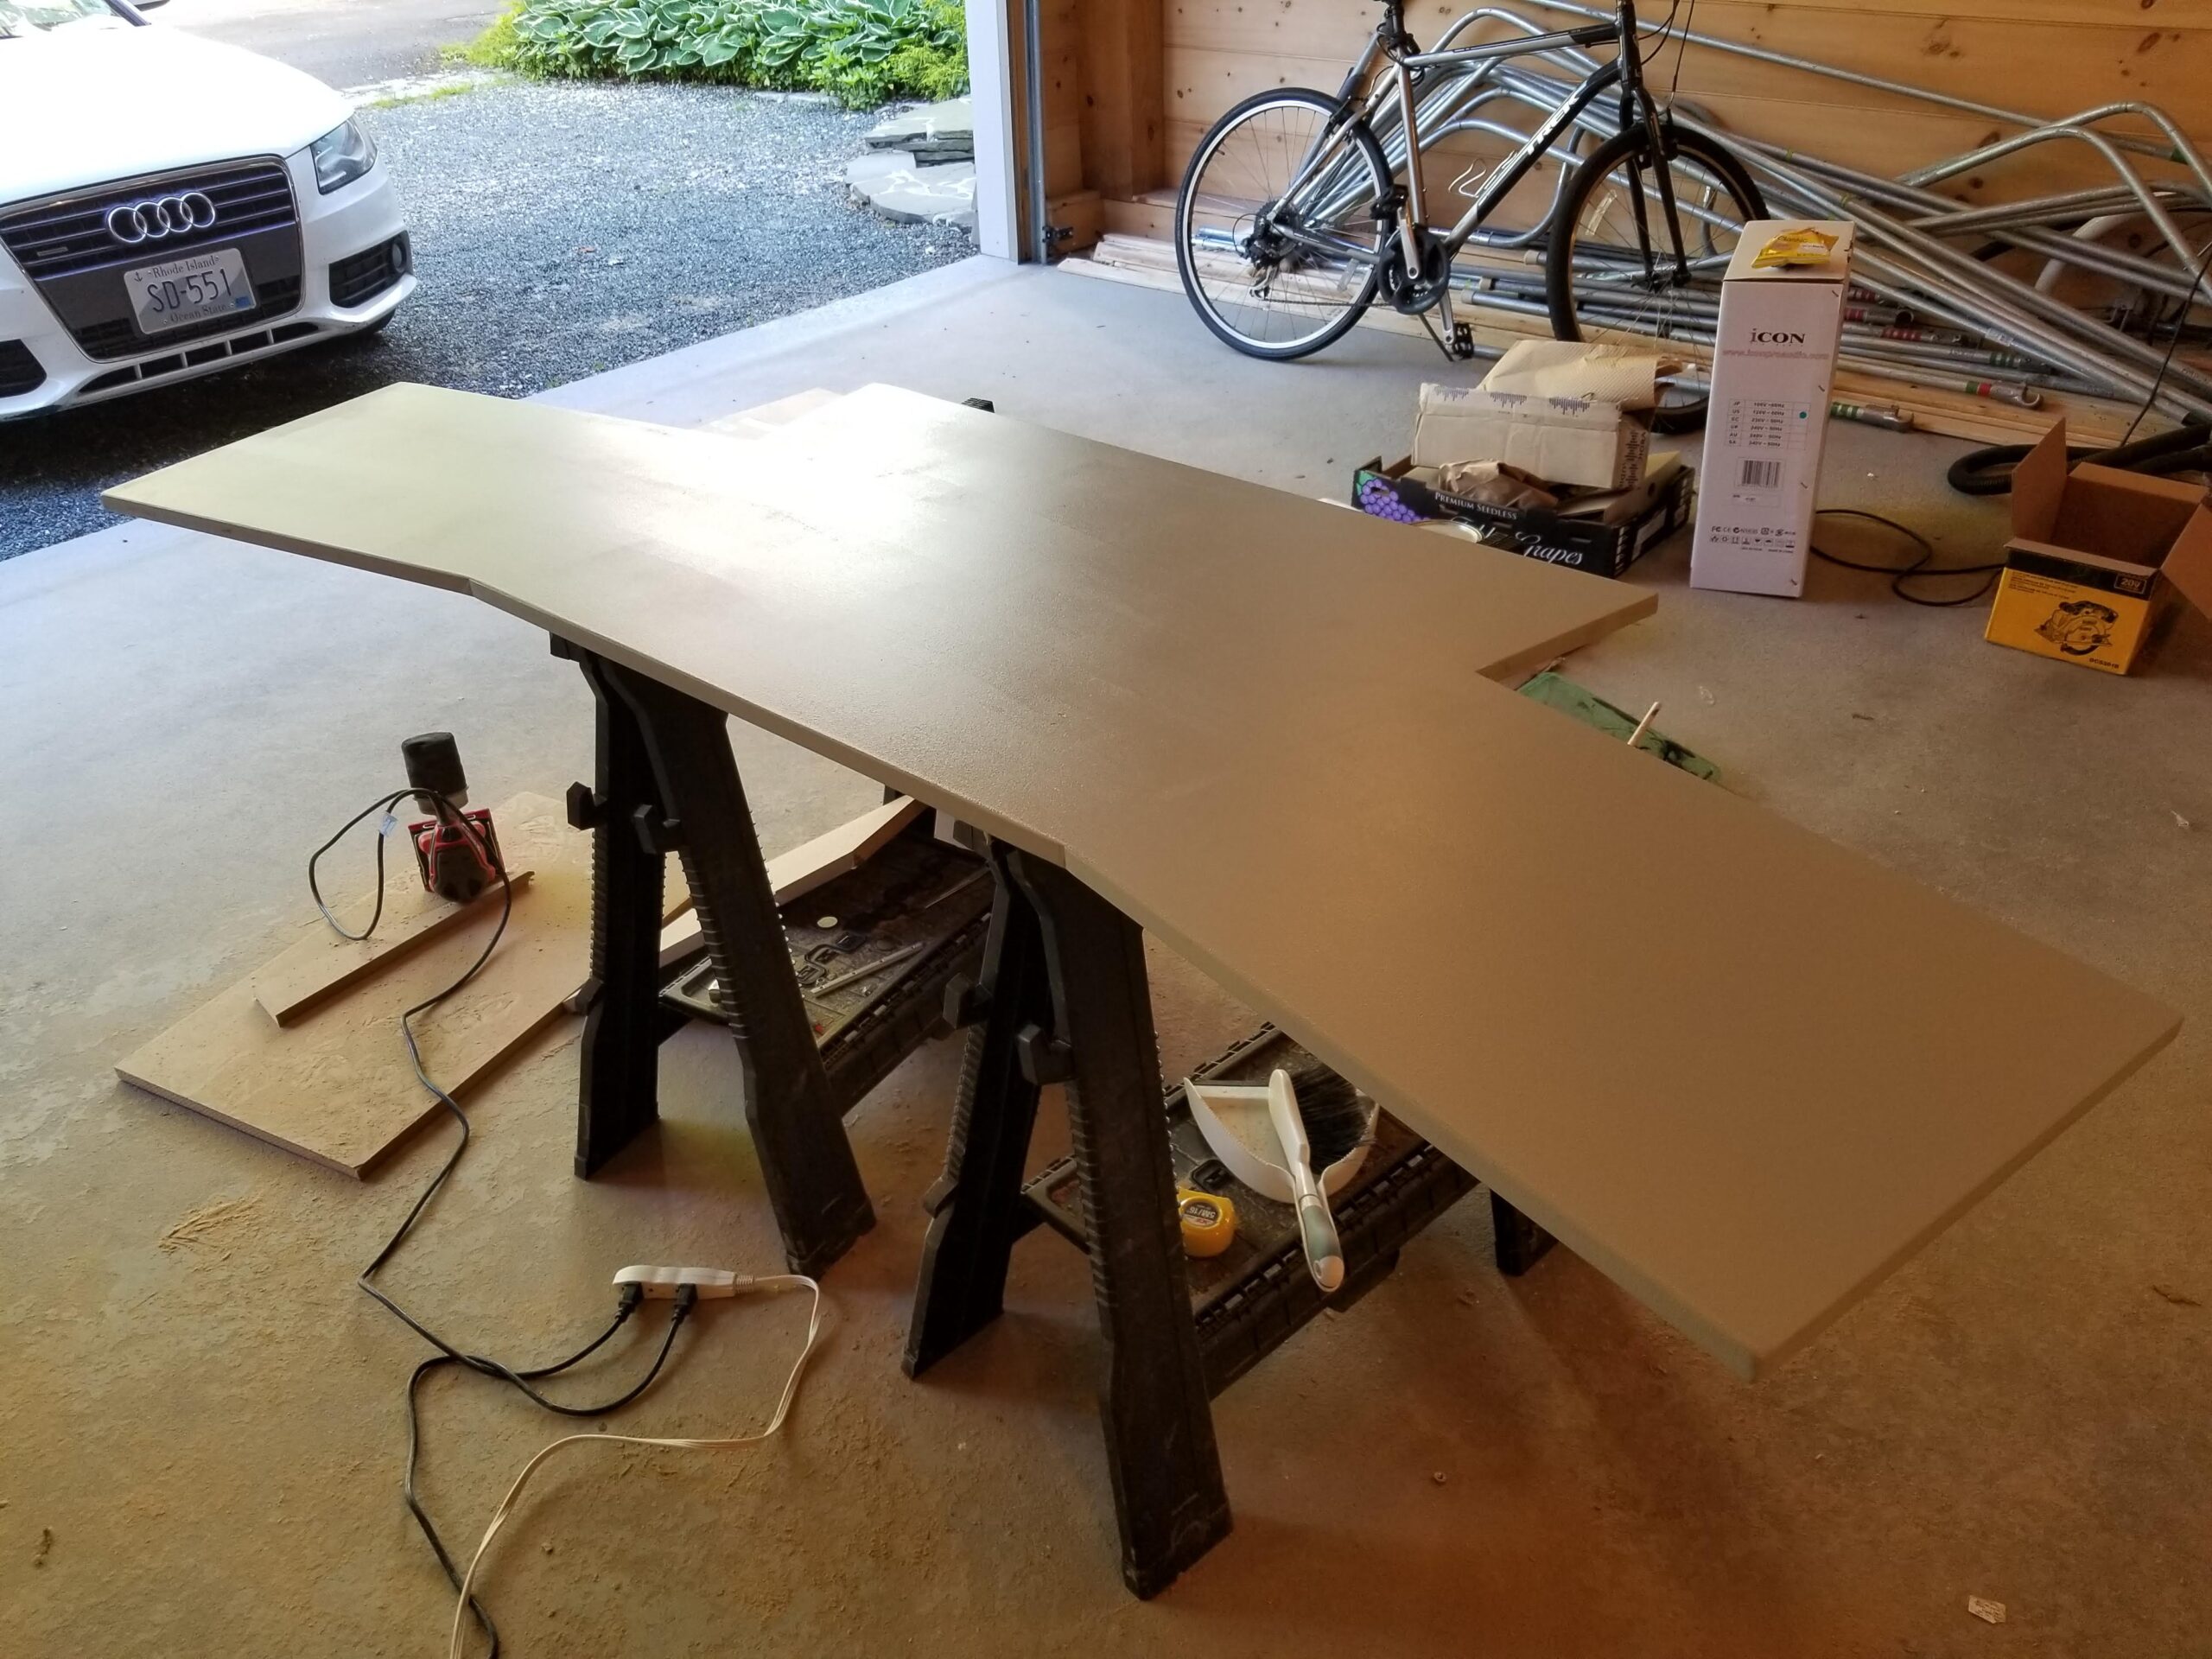
The desktop
My plan from the start was for the desktop to be plywood or maybe even laminated hardwood. To prototype and test the layout and shape, I decided to make one out of MDF as a temp stand-in. Well, once I primed and painted it, I couldn’t see any good reason to replace it. My MDF tabletop surface is working perfectly. It is supported well enough that there are no sags or wobbles at all.
The original chunkCut outPrimed and sanded
Regrets…
…I’ve had a few. But then again… not too few to mention here. Number one is as mentioned above, I should have spent more time in design phase of the low level details that went into attaching all the pieces together. The photos above showing the construction of the side wings is where things got very slow and frustrating. A few more hours on the computer would have made that all very simple. The only other thing I might have done different is with the shape of the side wing sides. They slope back at the top and I thought that would be clever for the rack space that is down there. But what I wish I would have done is actually make them slope forward at the top instead and make the rack rails perfectly vertical. It’s a minor thing, but something I would do differently if I was starting over.
I’m always looking for MXL donor mics to upgrade. I saw this beauty on ebay a few weeks ago. Yikes!
Ran over with car? Dropped from 100 feet? Who knows
Despite appearances, this mic is actually an ideal donor body for me. I normally replace the headbasket anyway and that was where the primary damage was (I also keep a stock of a few clean 990 headbaskets). The main part I care about is the bottom cylinder and internal frame. These parts in the 990 are built like a tank so even this owner would be hard pressed to ruin those bits. The few minor scratches on the body will be sanded and painted over anyway.
Totally New Inside and Out
As usual, the MXL board and small capsule are removed and replaced with my jaSb900 board and K47 style “Brass Ring” capsule. I already had one in stock with the optional pattern switch so I added one to this mic too – and give it the new pretty blue color.
The Paint ShopNew Capsule and CircuitNew HeadbasketFinished Mic along side the old circuit, capsule and trashed headbasket